Short answer
To tile a wall, start with sound, flat, clean drywall (fine for dry walls outside the shower). Plan the layout so the cuts at the corners and the top are even, never slivers. Screw a straight ledger board along a level line about one tile up, and tile up from it rather than from the floor or tub. Set the tile in a non-sag mortar with the right trowel, back-butter large tile, then grout, and fill inside corners and the bottom joint with flexible sealant.
Bathroom wall tile is one of the most common tile jobs in a house, and one where small errors show the most. A wall sits at eye level, often under bright vanity lights that pick out every crooked line. This guide explains how to tile a wall step by step, for bathroom walls, wainscots and feature walls outside the shower, including where to start and how high to go.
Which walls this guide covers
This guide is about dry walls: bathroom walls outside the shower, a wainscot, a laundry room wall or a feature wall. These walls get occasional splashes at most, so they don't need waterproofing.
Two kinds of walls have their own guides. Shower walls and tub surrounds are wet areas and need a waterproofing system behind the tile, plus details at the valve, niche and floor. We cover those in how to tile a shower, so we won't repeat them here. A kitchen backsplash follows the same basic steps as this guide, with its own details at the countertop and outlets; see backsplash installation.
Check the wall before you tile it
Tile can only be as good as the wall behind it. Sound drywall is a good base for tile on dry walls. Press on it: board that flexes, crumbles or shows water damage gets cut out and replaced. Screws should hold the board tight to the studs. Our guide to tiling over drywall covers painted walls, patches, skim coats and weight limits in detail.
Flatness matters more on a wall than most people expect. Hold a long straightedge or a level against the wall in several directions. Humps at taped seams and bowed studs show up as tile edges that stick out, and glossy or large tile shows them most. A commonly cited standard for tile with all sides under 15 inches is no more than 1/4" of variation in 10 ft, and large-format tile needs about half that. Knock down high spots and fill low ones before you start. Thin-set is a bonding layer, not a way to straighten a wall.
The surface also has to be clean. Wash off dust and grease, and dull glossy paint so the mortar can grip. Follow the mortar bag's guidance for painted surfaces, and never tile over wallpaper. If you are taking old tile off first, expect the drywall paper to tear, and plan to replace or properly repair that board.
How high to tile bathroom walls
Decide the height before you buy tile, because it sets the quantity, the layout and how the top edge is finished. There are three common choices.
A wainscot. Tile runs part way up the wall, with paint above. Common heights fall somewhere around chair-rail height, roughly a third of the way up the wall, but the best height is the one that relates to something in the room. Many installers line the top up with the top of the toilet tank, the vanity backsplash or a window sill, and adjust it so the top row is a full tile.
To the top of the shower tile. In many bathrooms, the wall tile stops at the same height as the shower tile, so a single line runs around the room. It looks deliberate and ties the shower into the room.
Floor to ceiling. Full-height tile suits small bathrooms, modern rooms and feature walls. It uses the most tile and makes the top cut at the ceiling visible, so the layout has to be planned from the top as well as the bottom. Our guide to small bathroom tile ideas has more on how tile height changes the look of a room.
Plan the wall tile layout
Layout decides how a tiled wall looks more than any other step. The goal is full tiles where the eye goes and even cuts where it doesn't. Do it on paper and with a tape before any mortar is mixed.
- Find the focal point. On a bathroom wall, it is usually the vanity, the mirror, a window or the centre of the wall seen from the door. Decide whether a grout line or the middle of a tile lands on that centre.
- Check both corners. Measure from the centre to each end and see what size the last tile is. If either end has a sliver, shift the layout by half a tile. Two cuts of at least half a tile look far better than one thin strip.
- Make a story pole. Mark a straight board with the tile and joint widths. Hold it vertically to see where each row lands: at the floor, the vanity top, the window, the outlets and the top of the tile.
- Adjust the height. Avoid a thin row at the ceiling or the top of the wainscot, and avoid a grout line that just misses a window sill or a vanity top. Moving the starting line up or down by part of a tile usually fixes both.
- Plan the corners between walls. Where two tiled walls meet, try to carry the rows around at the same height, so the grout lines meet in the corner.
Outlets and switches deserve a look at this stage too. A box that lands right on a grout line, or leaves a tiny strip of tile beside it, is hard to cut cleanly. Small shifts in the layout often avoid it. Patterns such as herringbone or vertical stacking have their own rules; see tile patterns and layouts and subway tile patterns.
Where to start tiling a wall: a level ledger board
The most common mistake on walls is starting the first row on the floor or the top of the tub. Floors and tubs are rarely level. If the first row follows them, every row above inherits the error. The joints run downhill and the top row tapers, which is easy to see against a ceiling or a window.
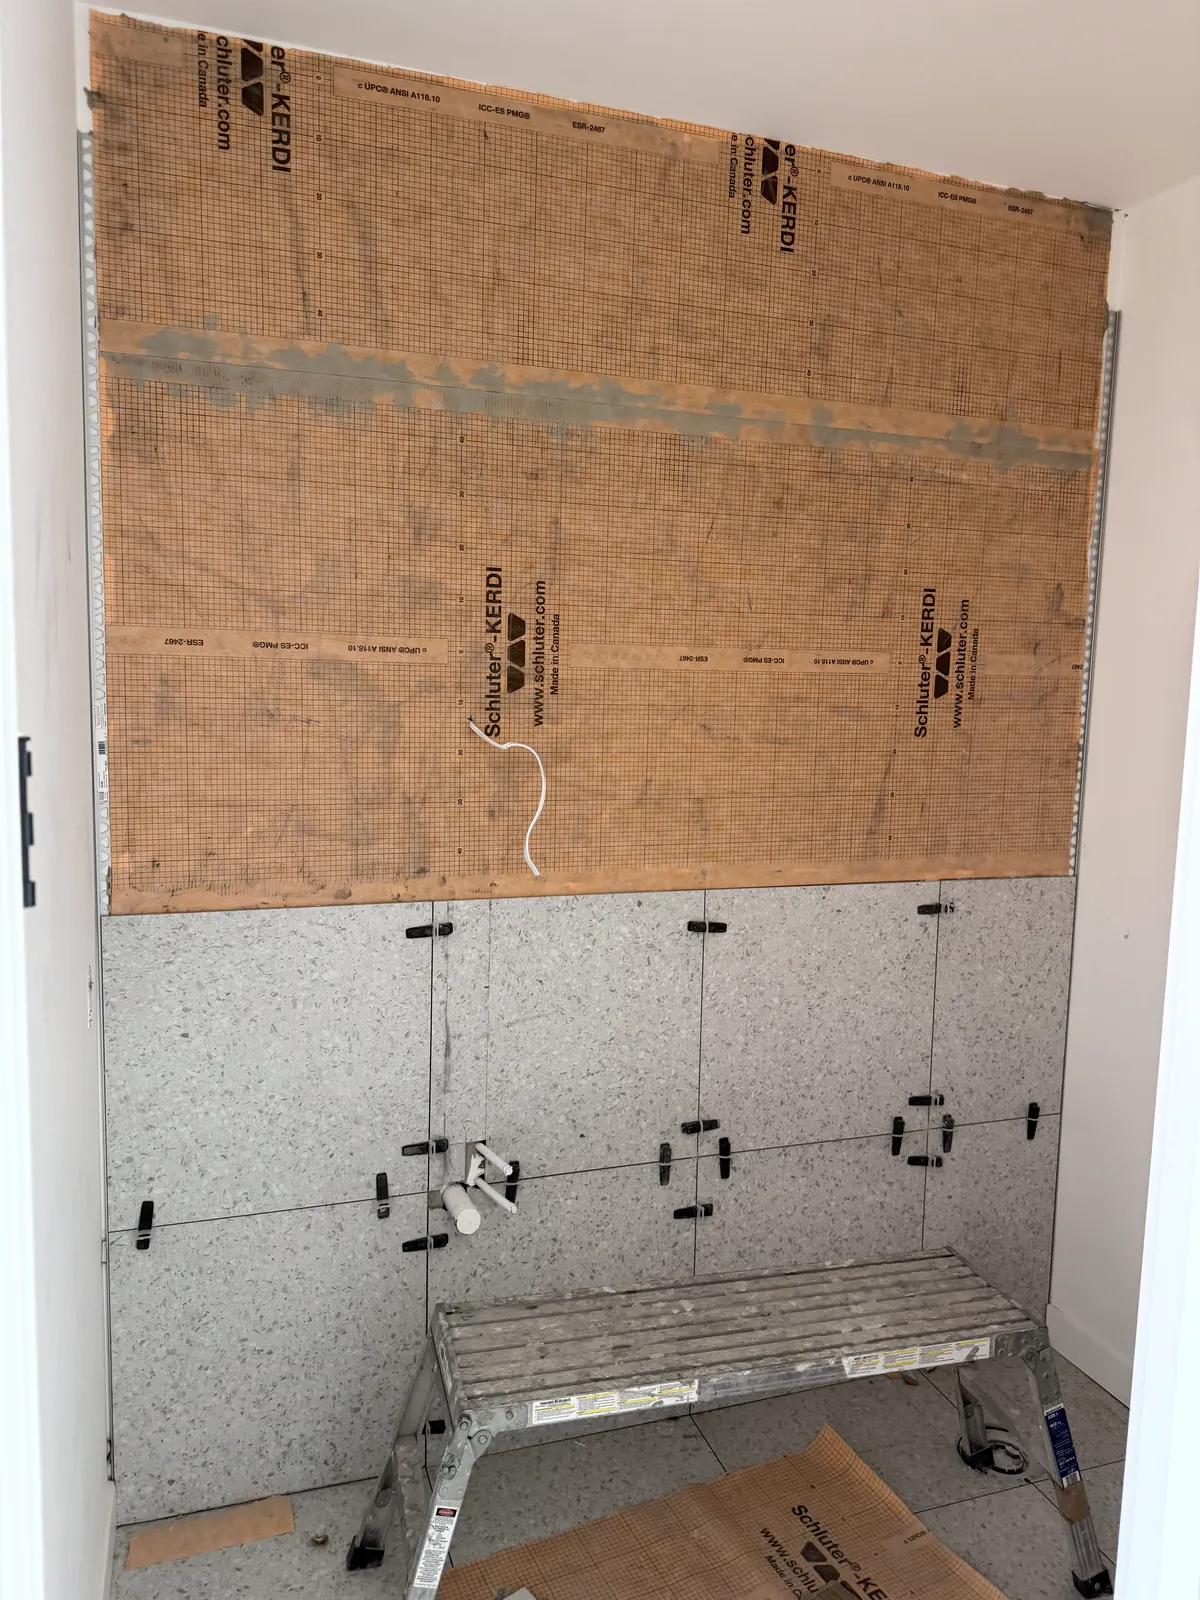
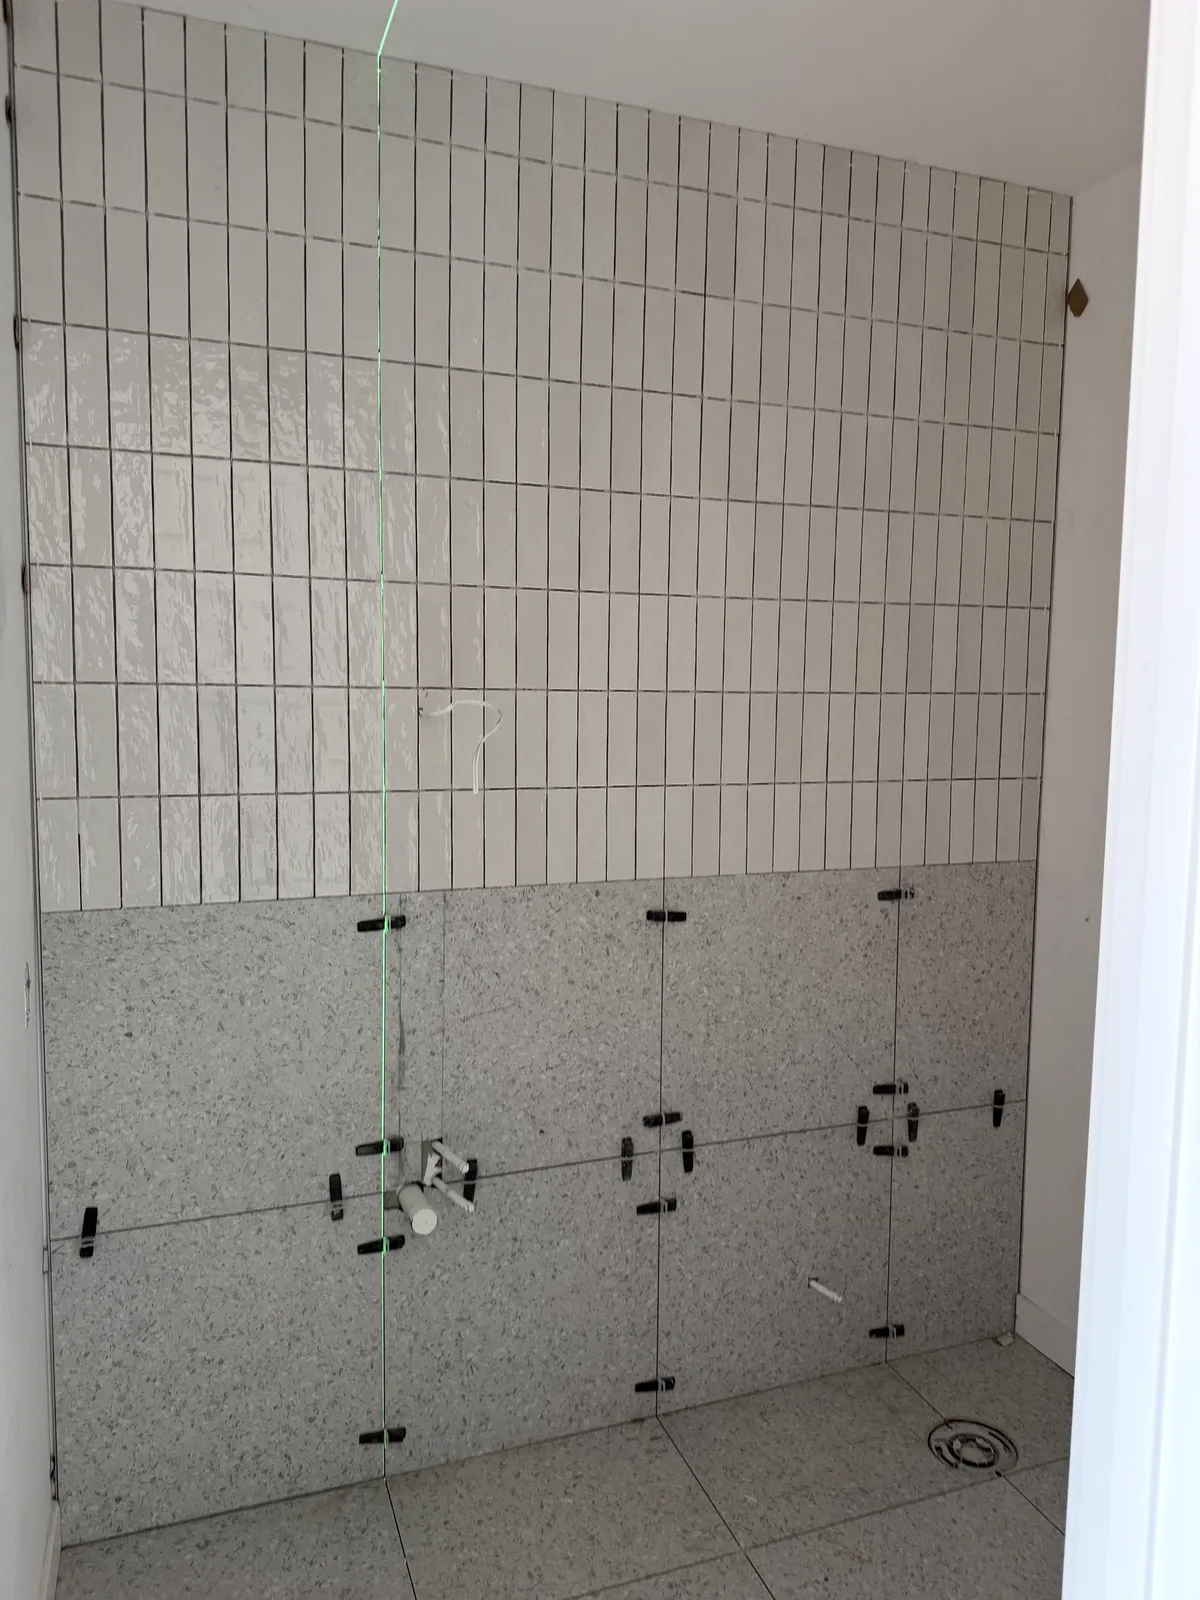
Instead, find the lowest point of the floor or tub along the wall. Mark a level line one tile height plus a joint above it, or at the row height your story pole gave you. A laser level is the easiest way to carry that line around the room, as in the photo at the top of this page. Screw a straight board (a ledger) along the line. It holds the first full row while the mortar cures, so the tile can't slide down.
Tile up from the ledger. Once the mortar has set, usually the next day, remove the ledger and cut the bottom row to fit between the floor or tub and the first full row. Leave a small gap at the bottom for sealant. Patch the screw holes in the drywall before the bottom row goes on.
For the vertical start, mark a plumb line at the layout centre or at a corner where you want a full tile. Check it with a level, because walls and corners are rarely plumb.
Mortar and trowel for wall tile
Wall tile needs a mortar that grabs the tile and holds it without slumping. A non-sag modified thin-set is made for this. For tile with any side about 15" or longer, use a large-and-heavy-tile mortar, often a lightweight non-sag type. Premixed adhesive (mastic) is only for the small, light tile and dry areas its pail allows. Glass tile and light marble go in white mortar. Our guide on which thin-set to use explains the ratings on the bag.
The trowel notch depends on the tile size and the wall's flatness. As a starting point, small wall tile and mosaics often use a 3/16" V-notch, subway tile a 1/4" × 1/4" square notch, and 12 × 24 tile a 1/2" × 1/2" square notch. Wall tile on a flat wall can often go one size smaller than floor tile of the same size. The full chart is in what size trowel for tile.
Mix only what you can use within the mortar's pot life, never add water to a stiffening batch, and spread only a small area at a time.
Setting the tile on the wall
Key a thin layer of mortar into the wall with the flat side of the trowel, then comb it with the notched side in straight lines. On rectangular tile, many installers run the ridges parallel to the short side of the tile so air can escape. Press each tile in with a slight slide across the ridges to collapse them.
Back-butter large tile with a thin, flat coat on its back. That fills the hollows in the tile's back pattern and helps reach full contact. Industry standards call for at least 80% mortar coverage in dry interior areas, with the edges and corners fully supported. Lift a tile now and then to check. Bare stripes mean the notch is too small or the mortar has skinned over.
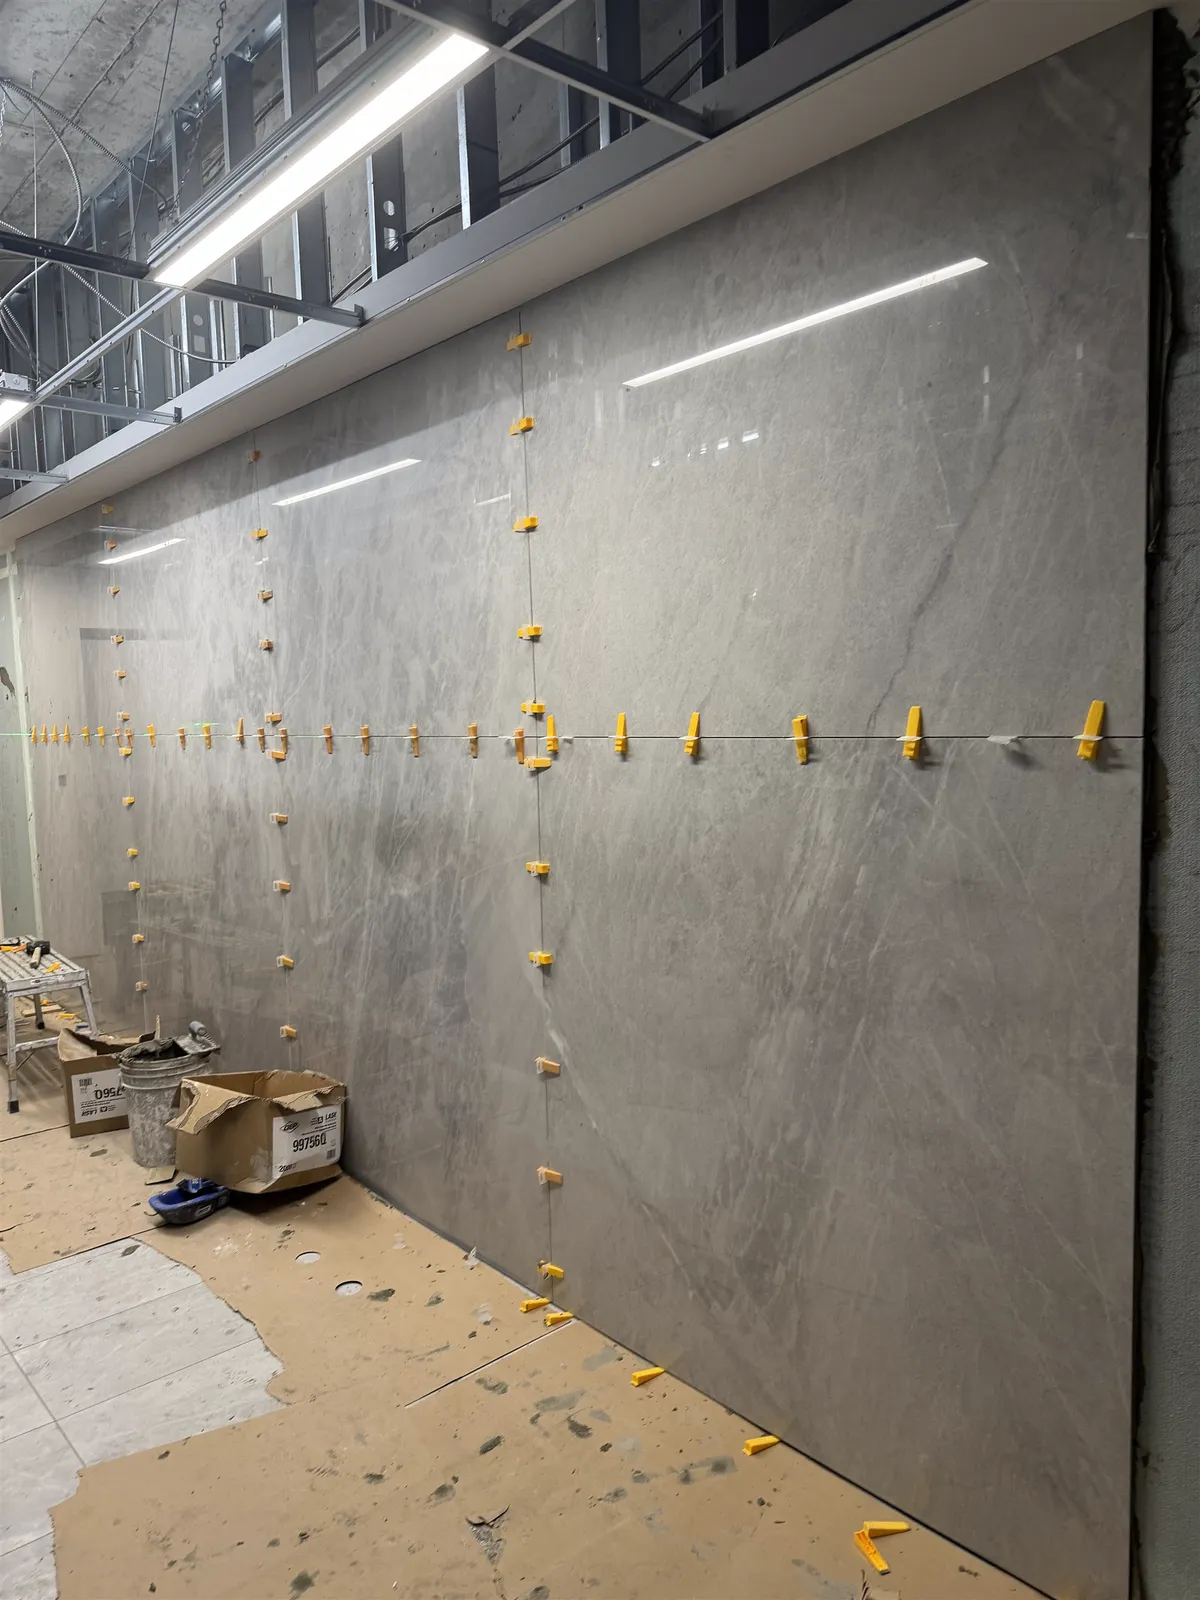
Work up the wall row by row from the ledger. Spacers hold the joints even and stop tiles sliding down, and wedges help where tiles vary in size. Our guide to tile spacers and grout joint width explains how to choose the joint. Levelling clips keep the edges of large tile flush, as in the photo above, but they can't fix a wall that isn't flat; see tile lippage and levelling systems.
Step back every few rows, sight along the wall and check level and plumb. Small drifts are easy to correct while the mortar is soft. Wipe mortar off the tile faces and rake squeeze-out from the joints as you go.
Cutting around outlets, switches, windows and pipes
Turn off the power to the circuit at the breaker before removing any cover plates, and test that each outlet is dead. Then remove the plates. Tile adds thickness, so the electrical boxes end up recessed behind the new surface. Box extenders bring the device out to the finished face so the plate sits flush. If wiring has to change, or a box needs to move, that is work for a licensed electrician, with an ESA permit where required.
Cut tile around a box so the cover plate hides the cut edges, with a small margin. L-shaped and U-shaped cuts are made on a wet saw or with a grinder, and holes for pipes with a diamond hole saw. Porcelain is hard and chips easily at the edges, so cut slowly with a blade made for it. Wet-cut where you can, and wear a respirator, eye and hearing protection, because cutting porcelain and stone releases silica dust. Our guide on how to cut porcelain tile covers each method.
At windows, decide whether the tile stops at the trim or wraps into the window return, which needs finished edges and careful cuts.
Finishing the edges and the top of a wainscot
Wherever the tile stops, the edge shows. That includes the top of a wainscot, the outside corner of a wall, the side of a window and the end of a run. A cut tile edge shows the tile body and chips easily, so it needs finishing.
The common options are a metal or PVC trim profile, such as Schluter-JOLLY or RONDEC, set into the mortar under the last tile; bullnose or finished-edge pieces made to match the tile; a decorative liner or chair-rail piece; or mitred tile on outside corners. Trim profiles are installed with the tile, not glued on afterward, so choose them before tiling starts. Schluter sells most profiles in lengths of 2.5 m (about 8'-2 1/2"), so a long run is planned in those lengths. Our guide to tile edge trim vs mitred edges compares the options.
Corners, the bottom row and the joints that get sealant
Inside corners, where two walls meet, are changes of plane. So are the joints where the wall meets the floor, the tub, the vanity top or the ceiling. The surfaces on each side move slightly differently, and rigid grout in those joints eventually cracks. Industry guidance is to leave them free of grout and fill them with a flexible sealant colour-matched to the grout.
At an inside corner, the first wall's tile stops a joint's width short of the second wall, and the second wall's tile butts up to it. Where wall tile meets floor tile, the wall tile usually sits on top of the floor tile with a sealant joint at the bottom. Our guide to tile movement joints explains why these soft joints matter.
Grouting the wall
Once the mortar has cured, usually about 24 hours with standard products, pull the spacers, knock off the clip tops and clean any mortar left in the joints. Then grout from the top down, so drips fall onto tile that hasn't been grouted yet. Wall tile is often set with narrow joints, which suit unsanded or high-performance grout. Check that the bag covers your joint width. The whole process, from mixing to haze, is in our guide on how to grout tile. Sealant goes in the corners and along the bottom after the grout has cured.
Large-format tile and feature walls
Large tile on walls, 12 × 24 and up, means fewer grout lines and a calm, modern look. It is also the hardest wall tile to set. The wall has to be flatter, each tile needs back-buttering and full coverage, and heavy tile wants to slide down before the mortar grabs. A ledger, a non-sag large-and-heavy-tile mortar and levelling clips are close to essential.
Weight also matters. Drywall can only carry so much, and the limit comes from the board, mortar and tile makers' guidance. For heavy porcelain or stone, a backer board rated for it may replace the drywall. Our large-format tile guide covers flatness and offsets, and our guide to feature wall tile covers layout and lighting on show walls.
What is DIY-friendly, and when to hire a pro
A small wainscot or a dry wall of subway or 12 × 12 tile is a reasonable DIY project for a patient person. Layout, a ledger board, setting small tile and grouting are all learnable. Take time over the layout and the level line, because they decide how the wall looks.
Large-format tile, natural stone, glass, full-height walls with many cuts, and patterned layouts are less forgiving. So are walls with windows, many outlets or out-of-plumb corners. And any wall inside a shower or tub surround needs waterproofing first. Agora Flooring tiles bathroom walls, showers and floors, and our bathroom and shower tile page shows how we work. For quantities, see how much tile do I need.
Frequently asked questions
Where do you start when tiling a wall?
From a level line about one tile up from the lowest point of the floor or tub, with a straight ledger board screwed along it. Work up from the ledger, then cut the bottom row to fit once the mortar has set. Start the layout from the wall's focal point so the cuts at both ends are even.
Can you tile directly on drywall?
Yes, on dry walls, if the drywall is sound, flat, clean and firmly fastened. Not in a shower or tub surround, where a waterproofing system is needed. See can you tile over drywall.
How high should bathroom wall tile go?
There is no fixed rule. Common choices are a wainscot at about chair-rail height, tile to the same height as the shower tile, or floor to ceiling. Pick a height that lines up with something in the room and ends on a full tile.
Do you start tiling a wall from the top or the bottom?
From the bottom up, starting at a level ledger board rather than the floor itself. Each row then supports the one above while the mortar cures.
Do you need to back-butter wall tile?
Back-butter large tile, natural stone and tile with a ridged or patterned back. It helps reach the 80% coverage standards call for in dry areas, with edges and corners supported. Small wall tile on a flat wall often doesn't need it.
Should you grout or caulk where the wall tile meets the floor?
Caulk it with a flexible sealant colour-matched to the grout. The same applies to inside corners, the tub and the vanity top, because those joints move.