Short answer
How to cut tile depends on the cut. Straight cuts in porcelain are scored once and snapped on a manual cutter. Notches, L-cuts and curves are made with a wet saw or an angle grinder fitted with a porcelain-rated diamond blade. Holes are drilled with a diamond core bit kept wet, with the hammer setting off. Porcelain is harder than ceramic, so sharp tools and a steady feed matter. Cut wet to control silica dust, and plan the layout so cut edges hide under trim, baseboard or cabinets.
Every tile job has cuts, and they are where most of the time goes. A full tile is set in seconds. A tile cut around a door jamb, a pipe or a tub apron can take ten minutes and still break on the last pass. This guide explains how to cut porcelain tile, and ceramic too, with the right tool for each kind of cut. It also covers how to avoid chips and how to stay safe while cutting porcelain tile.
Why porcelain is harder to cut than ceramic
Porcelain is made from finer clay, pressed hard and fired hotter than ceramic. The result is a dense, hard body that absorbs 0.5% of its weight in water or less. That is what makes it so durable on floors and in showers, and it is also why it resists cutting. A ceramic wall tile scores easily and snaps cleanly. Porcelain needs more pressure, a sharper wheel and diamond blades, and it is less forgiving of a hesitant score or a dull blade.
The body matters too. On glazed porcelain, the cut edge shows a body that can be a different colour from the face. On colour-body and through-body porcelain, the colour runs through, so cut edges and small chips show less. Our guide to porcelain vs ceramic tile explains the types.
How to cut tile: the tools compared
Most installers carry several of these, because no single tool makes every cut well.
| Tool | Best for | Limits |
|---|---|---|
| Manual score-and-snap cutter | Fast, clean straight and diagonal cuts; little dust or noise | No notches, curves or very thin strips; length limited by the rail |
| Rail cutter for large-format | Long straight cuts in large tile and thin panels | Needs a flat, fully supporting table; straight cuts only |
| Wet saw (tile saw) | Straight cuts, thin strips, notches, bevels and mitres; clean edges | Water and setup; small saws limit tile size |
| Angle grinder with porcelain diamond blade | Notches, outlet cut-outs, curves and cuts on installed tile | Rougher edge; lots of dust if cut dry; needs a steady hand |
| Diamond hole saws and core bits | Round holes for pipes, valves and drains | Must be kept wet; slow in dense porcelain |
| Tile nippers | Small bites from ceramic and mosaic pieces, shaping curves | Hard on dense porcelain; rough edges |
How to cut porcelain tile in a straight line
With a manual cutter. Mark the cut on the face. Set the tile against the fence with the mark under the scoring wheel. Make one firm, steady score from one end to the other. Don't go over it a second time, because a second pass usually chips the glaze and gives a ragged break. Then press the breaker down to snap the tile along the score. Very thin strips often break badly on a manual cutter and are better cut on a wet saw.
With a wet saw. Check that water is flowing over the blade before starting. Hold the tile flat on the table and feed it slowly and steadily, letting the blade do the work. Slow down near the end of the cut, where the last piece tends to snap off and chip. Support long pieces on both sides of the blade.
With a grinder. Clamp or firmly support the tile, mark the line, and make a shallow scoring pass first. Then cut through in one or two more passes. A grinder is handy for a single cut on site, but a saw or manual cutter leaves a cleaner edge.
L-cuts and notches
L-cuts and notches fit tile around door jambs, cabinet bases, tub corners and wall returns. The usual method is two straight cuts on a wet saw or with a grinder, stopping each one at the inside corner. Don't run the blade past the corner on the face side, because the overcut shows. Finish the corner from the back, where the round blade can reach further, or snap out the waste carefully.
The inside corner of an L-cut concentrates stress, and a crack can start there later. On porcelain, and especially on large tile, many installers drill a small hole at the inside corner first and cut into it. The rounded corner is much less likely to crack. At door frames, the best cut is often no cut. Undercut the casing and jamb with a flush-cut saw, so the tile slides underneath and the edge is hidden.
How to drill porcelain tile for pipes and valves
Round holes for supply pipes, shower valves, shower arms and tub spouts are drilled with a diamond hole saw or core bit. A regular masonry bit will struggle in porcelain, and a hammer setting cracks tile.
- Mark the centre and size the hole so the escutcheon or trim plate covers its edge.
- Start at an angle. Tilt the bit and touch the edge of the circle to the tile so it cuts a small crescent. Then slowly bring the drill upright. A drilling guide or jig does the same job and stops the bit from wandering.
- Keep it wet. Use water spray or a wet sponge, or a bit made to run with its own coolant. Heat ruins diamond bits and can crack the tile.
- Drill from the face, at low to moderate speed with light pressure. Rock the drill slightly to clear the slurry.
- Slow down as you break through, so the back doesn't blow out.
Where a pipe lands close to a tile edge, a hole drilled too close is likely to crack. It is often easier to cut a half-circle in the edge of each of two neighbouring tiles. In a shower, every hole also goes through the waterproofing, so it is sealed the way the membrane maker specifies. Drilling into tile that is already installed, for towel bars or grab bars, uses the same method. Grab bars need solid blocking behind the tile.
Outlet and switch cut-outs
Turn off the power at the breaker before working around any outlet or switch. For a box that falls in the middle of a tile, mark its outline, then drill a hole at each corner with a small diamond bit. Connect the holes with straight cuts using a grinder from the face, or with plunge cuts on a saw. The cut-out only needs to be clean enough for the cover plate to hide it. For a box at the edge of a tile, a U-shaped notch from the edge is simpler and stronger than a hole. Splitting the cut-out between two tiles at a joint is another option. Our guide on how to install a backsplash covers the outlet box extenders as well.
How to cut tile in a curve
Curves come up around toilet flanges, tub aprons, pedestal bases and arched openings. Trace the curve on the tile, using a paper template for odd shapes. Then make a series of straight relief cuts from the edge to the line, close together, with a wet saw. Snap or nip the fingers out and grind the edge smooth to the line. An angle grinder can also follow a gentle curve directly, in shallow passes.
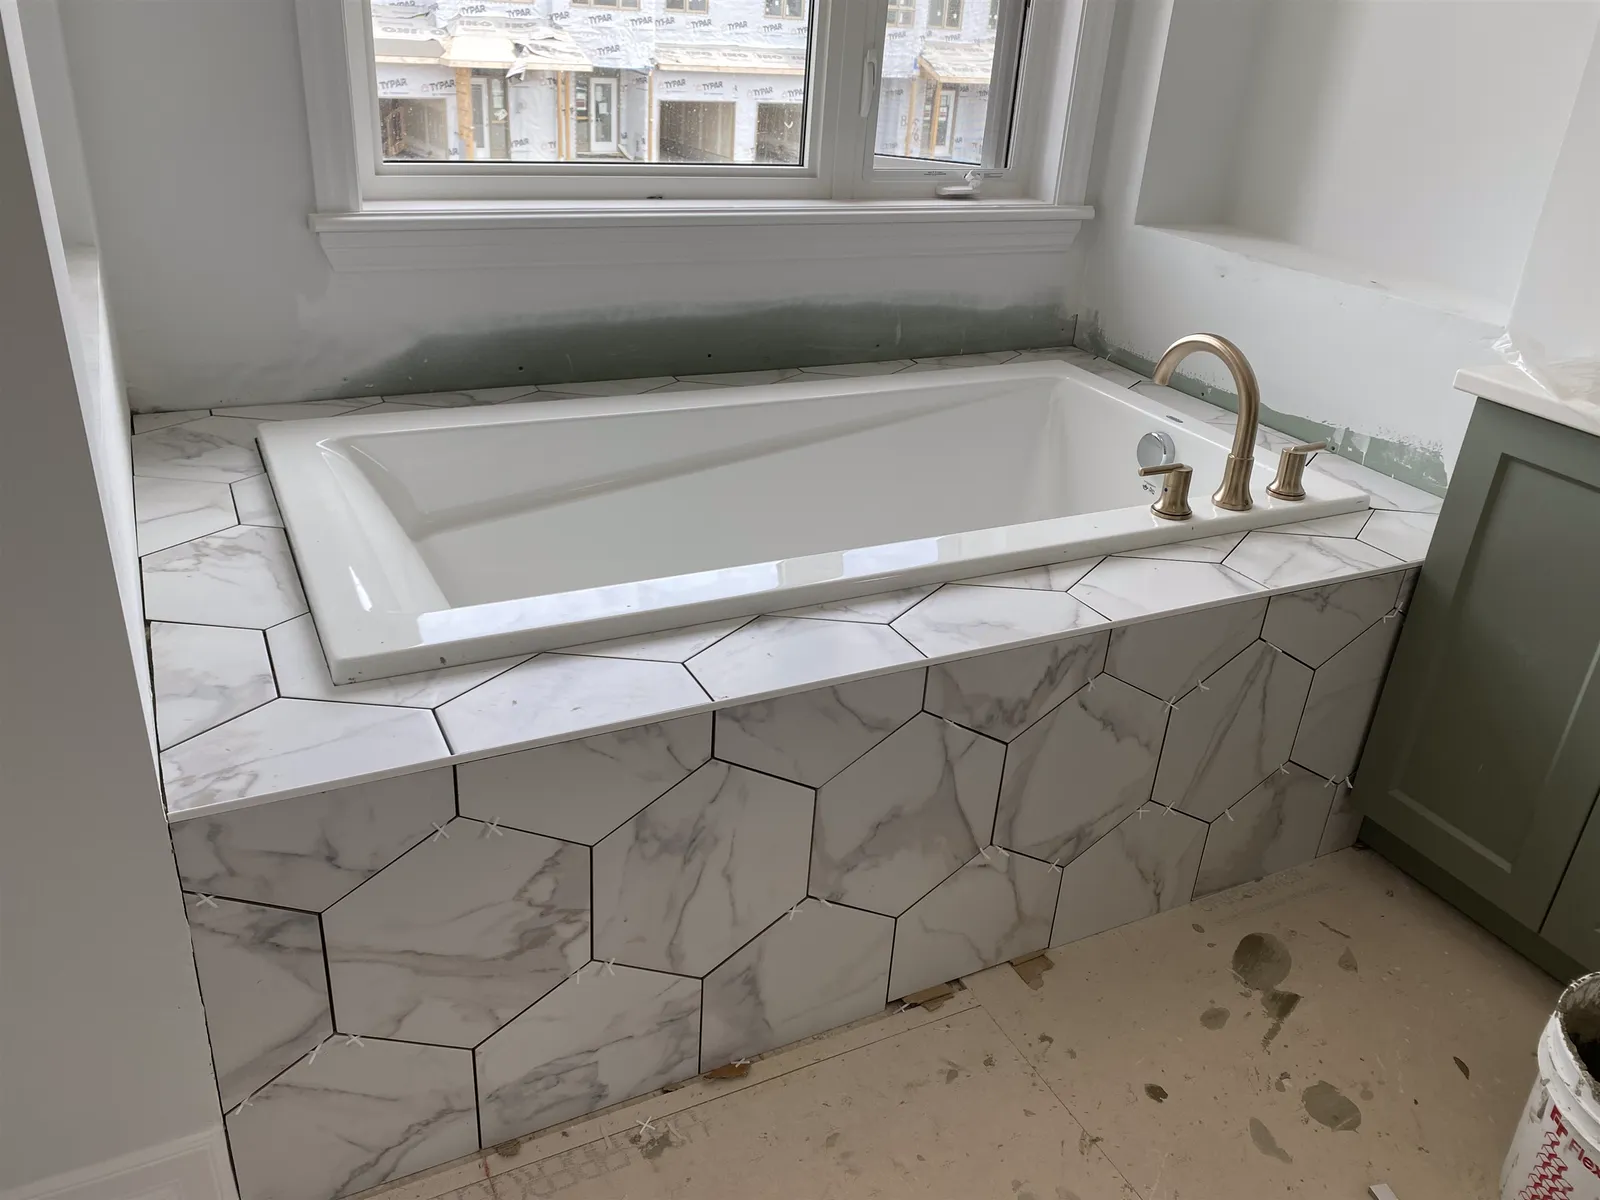
Nippers work well on ceramic and mosaics but take small bites from porcelain and can crack it. Around a toilet flange, the cut only needs to be close, because the toilet base covers it. Around a tub deck or apron, as in the photo at the top of this page, the cut stays visible. It has to follow the shape closely, and a sealant joint is left between the tile and the tub.
Cutting large-format and slab tile
Tiles of 24 × 48 inches and larger, and thin porcelain panels, are cut differently. The panel must be fully supported on a flat table while it is scored and snapped. A tile that sags or flexes during a cut can crack across. Rail cutters score long lengths in one pass and break the panel along the line. Wet rail saws handle thicker tile. Large pieces are carried on edge by two people, or with a carrying frame for panels.
Cut edges on large porcelain can be weaker than factory edges. Tiny chips along a cut edge can grow into cracks under stress. Many panel makers recommend smoothing or slightly bevelling cut edges with a diamond pad, and rounding the inside corners of L-cuts and cut-outs. Our large-format tile guide covers the flatness and coverage these tiles also need.
Cutting mosaic tile
Mosaics come on mesh or paper sheets. For straight runs, cut the backing with a utility knife along a grout joint, so whole pieces come away. Where individual chips need trimming, remove them from the sheet and cut them separately. Wheeled nippers work for ceramic and glass, and a small wet saw suits stone and porcelain mosaics. Glass mosaics need a blade made for glass, or they chip badly. See mosaic tile installation.
Mitre cuts
A mitre joins two tiles at an outside corner by cutting each edge at about 45 degrees, so the faces meet without trim. It is cut on a wet saw with a tilting head or table, usually leaving a tiny flat at the face so the edge doesn't chip. Mitres work best on colour-body or through-body porcelain and on flat, square walls. Our guide to tile edge trim vs mitred edges compares mitres with metal profiles and bullnose.
Smoothing cut edges and avoiding chips
A fresh cut edge on porcelain is sharp. A rubbing stone or diamond hand pads, used wet, take off the sharp corner and small chips. Ease the edge with a light bevel rather than grinding it round. On an exposed edge that won't be covered by trim, polish it carefully, or better, plan for a profile.
Most chipping comes from a few causes. The scoring wheel or blade is worn. The blade isn't made for porcelain. The tile is fed too fast, or forced at the end of the cut. On a manual cutter, the score was done twice. Use a continuous-rim diamond blade rated for porcelain, and replace scoring wheels and blades when they stop cutting cleanly. Painter's tape along the line can reduce chipping on glazed tile with a grinder. Test a scrap piece of each new tile before cutting good pieces. If a tile chips after it is installed, our guide on how to fix chipped tile covers repairs.
Plan the layout so cuts are hidden
The best cut is one nobody sees. Good layout puts cut edges under baseboard, behind trim, under cabinets and vanities, and in the least visible corner. Full tiles go at the doorway and the main sightline. Shift the layout so no wall or doorway ends with a sliver: thin strips are hard to cut, break easily and look like mistakes. Our guide to tile patterns and layouts explains how to centre a room, and how to tile a floor covers the full sequence.
Safety when cutting porcelain tile
Porcelain, ceramic, stone and mortar contain crystalline silica. Cutting and grinding them dry releases fine dust that can cause serious, permanent lung disease. This is why wet cutting is the standard. A wet saw, or a grinder with water feed or a dust shroud connected to a suitable vacuum, keeps most of the dust out of the air.
Don't dry-cut indoors without dust control. Wear a properly fitted respirator rated for fine dust when cutting, grinding or mixing powders. Eye protection is a must, since fragments fly off blades and nippers. Wear hearing protection too, because saws and grinders are loud. Keep the guards on, plug wet saws into a ground-fault (GFCI) protected outlet, and keep hands clear of the blade. In winter in Ottawa, it can be tempting to cut in the garage or basement. Set up the wet saw in a well-ventilated space and keep the water away from electrical connections.
How much extra tile to order for cuts
Cuts produce waste, and a few tiles break. A common allowance is about 10% over the floor or wall area for a straight layout. For diagonal and patterned layouts, allow 15% or more; see herringbone floor tile. Small rooms with many cuts, large-format tile, where one broken piece is a big loss, and mosaics with many trimmed edges can need more. Order everything from the same production batch, and keep a few spare tiles after the job for repairs. For budgeting the whole job, see tile installation cost in Ottawa.
Should you cut porcelain tile yourself?
Straight cuts with a good manual cutter and simple notches on a rented wet saw are well within reach for a DIYer. Practice on spare tiles first. Holes for valves, outlet cut-outs, large-format panels, mitres and long runs of exposed edges are harder, and a broken tile there can mean waiting for more stock. Cutting time is one reason porcelain takes longer to install than ceramic. Agora Flooring has installed tile in homes and buildings across Ottawa for over 26 years. Our tile installation page explains how we work.
Frequently asked questions
Can you cut porcelain tile with a manual tile cutter?
Yes, for straight and diagonal cuts, with a good cutter and a sharp scoring wheel. Score once with firm, even pressure, then snap. Notches, curves and very thin strips need a wet saw or grinder.
What blade do you need to cut porcelain tile?
A continuous-rim diamond blade rated for porcelain. Segmented blades cut fast but chip glazed tile. Replace the blade when it starts to chip or slow down.
Can you cut tile without a wet saw?
Yes. A manual cutter handles straight cuts and an angle grinder with a diamond blade handles notches and curves. Use water or dust extraction with a grinder, and never dry-cut indoors without dust control.
How do you drill a hole in porcelain tile without cracking it?
Use a diamond core bit, keep it wet, start at an angle or with a guide, drill at low to moderate speed with light pressure, and keep the hammer setting off. Avoid holes very close to a tile edge.
Why does my tile chip when I cut it?
Usually a worn wheel or blade, a blade not made for porcelain, feeding too fast, or scoring twice. Slow down at the end of each cut and support the off-cut.
Which side of the tile do you cut from?
Score from the face on a manual cutter, and cut face up on most wet saws. For holes, drill from the face. Check your saw's instructions, as some cut cleaner face down.