Short answer
The classic subway tile pattern is a running bond, with each row offset by half a tile. Longer subway tile, such as 3 × 12, is usually laid with a 1/3 offset instead, because slightly bowed tiles show uneven edges in a half offset. Stacked and vertical stacked layouts look more modern but show every wander in the joints. Herringbone, chevron and basketweave make a feature of the wall and take the most layout time and cutting. Whatever the pattern, the layout is centred on the range, window or shower valve and started from a level line.
Subway tile is one of the simplest tiles you can buy and one of the most versatile. The same plain rectangle can look like a century-old café, a clean modern kitchen or a striking shower wall, depending only on how it is laid. This guide covers the main subway tile patterns, how each one is set out and installed, and the details that make them look right: start lines, centring, lippage on glossy tile, edges and grout colour. For a wider comparison of tile layouts on floors and walls, see tile patterns and layouts.
Subway tile sizes: 3 × 6 vs 3 × 12 and longer
The original subway tile is 3 × 6 inches (about 75 × 150 mm), a 2:1 rectangle. It is still the most common size, especially for backsplashes and traditional bathrooms. Longer formats such as 3 × 12, 4 × 12, 2 × 8 and 4 × 16 are now just as popular. They give a sleeker, more modern line and fewer joints across a wall.
The size changes which patterns work best. A 3 × 6 suits almost any layout, including a half-offset running bond, herringbone and basketweave. Longer tiles look elegant stacked or in herringbone, but they are more likely to have a slight bow, which affects the offset you can use. Shape also matters: some subway tile has a flat face and square edges, while traditional and handmade-look tile has a cushioned or bevelled edge and a wavy glaze.
Before you choose a pattern, check three things on the box or spec sheet: the actual size (which can differ slightly from the nominal size), whether the tile is rectified or pressed, and the maker's recommended joint width. Some glazed wall tiles have small spacer lugs on the edges and are designed to be set almost tight.
Running bond: the classic half offset
In a running bond, also called a brick pattern, each row starts half a tile along from the row below, so every vertical joint lands in the middle of the tile above and below. It is the traditional subway tile pattern and still the most popular. It suits any style, and it is forgiving: the eye reads the brick pattern as a whole rather than any single joint, so small variations in tile size disappear.
To install a running bond, the installer marks a level line for the first full row and a vertical centre line on the focal point. Rows alternate between a tile centred on that line and a joint centred on it. The vertical joints are checked with a level every few rows. The offsets drift easily if each row is set only by eye, and a drifting running bond starts to look like a staircase.
A half offset works best with short tiles such as 3 × 6. With longer tile, the half offset can cause trouble.
The 1/3 offset and why longer tiles use it
Long tiles are rarely perfectly flat. Most have a slight bow, with the centre a little higher or lower than the ends. In a half offset, the middle of one tile sits next to the ends of the tiles above and below, which is exactly where their heights differ most. The result is lippage, uneven edges that catch the light along every joint.
A 1/3 offset reduces that. Each row starts a third of a tile along, so the pattern repeats every three rows, and the parts of each tile sitting side by side are closer in height. Industry guidance commonly limits the offset to no more than one-third of the tile's length for tile with a side longer than about 18", unless the tile maker says otherwise. Many installers also use a 1/3 offset on 3 × 12 and 4 × 12 subway tile to keep the edges flush, even though they are shorter than that. Some makers ask for a smaller offset still; the box or spec sheet will say.
A 1/3 offset looks a little more relaxed than a brick pattern, with joints that step diagonally across the wall. If you want the classic half offset with longer tile, ask whether the maker allows it for that product, and expect the installer to be strict about wall flatness. Our guide to tile lippage and levelling systems explains how edges are kept flush.
Stacked and vertical stacked subway tile
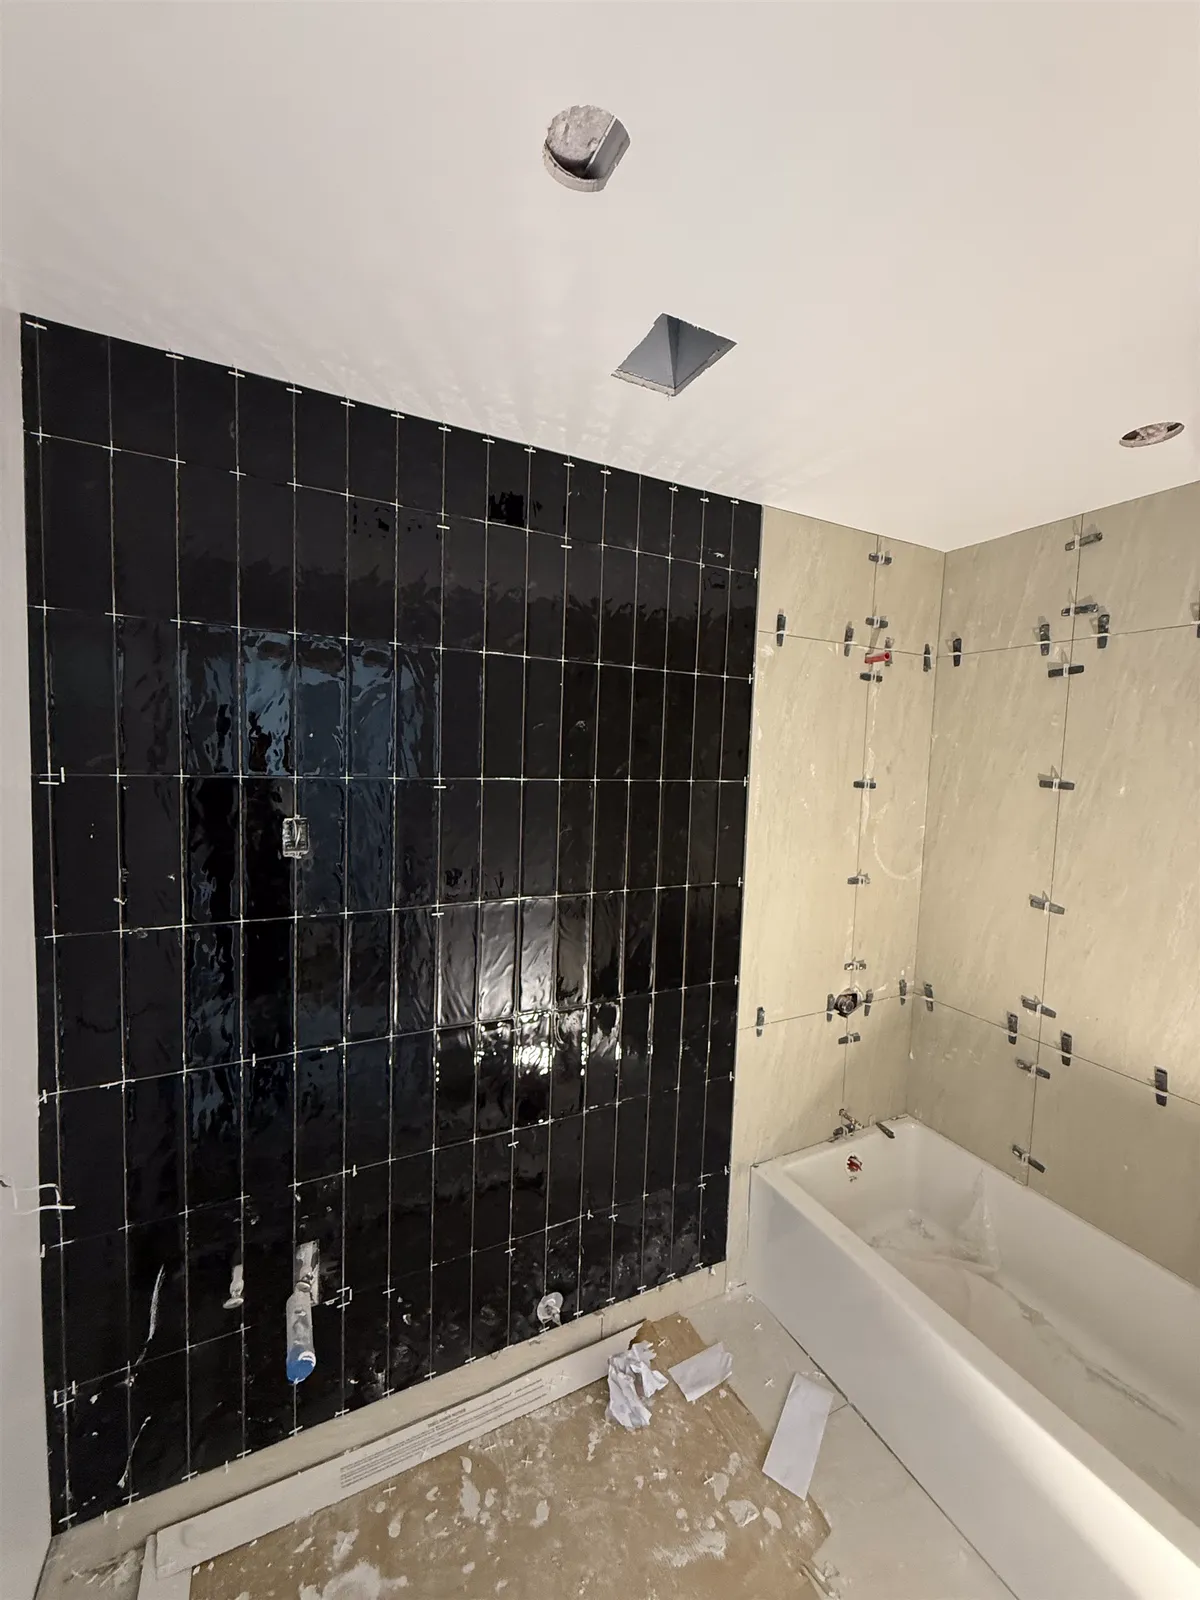
A stacked layout, also called straight lay, lines the tiles up in a grid so every joint runs straight both ways. Laid horizontally, it gives a calm, modern look. Turned vertical, as in the photo above, it draws the eye upward and makes a low wall or ceiling feel taller. Vertical stacked subway tile is a popular choice for shower walls and full-height backsplashes, and long, narrow tiles such as 2 × 8 or 3 × 12 look especially good this way.
A stacked layout is the least forgiving pattern for subway tile. Every joint runs from the floor or counter to the top of the wall, so any wander in spacing, any tile that is a little larger than its neighbours and any wall that is out of plumb shows immediately. The wall must be flat, the start lines exact and the tile consistent in size. Rectified tile, ground to a precise size after firing, makes a stacked grid much easier to keep straight. With handmade or pressed tile that varies, many installers suggest a running bond instead.
A stacked layout has no offset, so bowed tiles line up end to end and lippage is less of a concern than in a half offset. The joints still have to be checked constantly with a level, especially vertical joints in a vertical stack, which show every lean.
Vertical offset subway tile
A vertical offset is a running bond turned 90 degrees: the tiles stand upright, and each column is offset from the next by half or a third of a tile. It combines the height of a vertical layout with the softer, brick-like rhythm of an offset. It suits shower walls, powder rooms and narrow feature walls.
The same offset rules apply. With longer tile, a 1/3 offset keeps the edges flatter. The layout starts from a plumb line rather than a level line, and the installer has to control the tiles' tendency to slide down the wall while the mortar sets. Spacers or wedges hold the joints, and a non-sag mortar helps. The top and bottom cuts need planning too, so the columns don't end in a row of thin slivers at the ceiling or counter.
Herringbone and chevron subway tile
A herringbone subway tile pattern sets rectangles in a zigzag, with the end of each tile butting against the side of the next. It works with 3 × 6 tile, and longer sizes such as 2 × 8 or 3 × 12 give a longer, sleeker zigzag. Herringbone can run horizontally, with the points across the wall, or vertically, with the points running up. A vertical herringbone behind a range or on a shower's back wall is one of the most requested feature details.
Herringbone takes the most layout work of any subway pattern. The installer marks a centre line on the focal point, usually the range, hood or window, and sets the pattern out from it so the points land exactly on centre. The first few tiles are set against a straightedge or guide to get the 90-degree angle right, because a small error at the start grows across the wall. Almost every tile at the edges, top and bottom needs an angled cut. That means more labour and more waste than a straight layout; ordering about 15% or more extra tile is typical, compared with about 10% for a running bond.
Chevron looks similar but uses tiles made with angled ends, so they meet in a clean point on a straight line. Ordinary subway tile can't make a true chevron without cutting every end, so chevron is usually bought as a dedicated chevron tile. Herringbone on floors follows the same layout rules; see herringbone tile floors.
Basketweave and other subway tile patterns
A basketweave sets pairs of tiles at right angles to each other, like a woven mat. With subway tile, two tiles laid side by side form a square, and the next square is turned 90 degrees. It only closes up properly when two tile widths plus the joint between them equal one tile length. With many 3 × 6 tiles, the actual sizes come close, but not always, so dry-lay a few squares with spacers first. Basketweave is also widely sold as mosaic sheets, often in marble, which removes the guesswork and installs much faster.
Other patterns are possible: a double herringbone with pairs of tiles, a crosshatch, or a stacked field framed by a border of tiles turned the other way. They all follow the same rule. The more directions the tiles run, the more layout time and cutting the wall needs. Choose one strong pattern per room. A herringbone wall looks best next to a quiet floor, and a plain running bond lets a patterned floor lead. Our kitchen backsplash ideas and shower tile ideas show how patterns are combined.
Laying out subway tile: start lines and centring
Good subway tile layout is planned before any mortar is mixed, whatever the pattern.
Start from a level line, not the counter or tub. Countertops, tubs and floors are rarely perfectly level, and an error in the first row carries up every row above it. The installer finds the lowest point, marks a level line about one tile up, and supports the first full row on a ledger board or spacers. The bottom row is then cut to fit the counter or tub. In a shower, the same applies at the tub or the shower floor.
Centre on the focal point. On a backsplash, that is usually the range and hood or the window over the sink. In a shower, it is the valve and shower head, or the niche. The installer decides whether a joint or the middle of a tile falls on the centre line, then checks where the cuts land at each end. Two even cuts at both ends of a wall look far better than a full tile at one end and a sliver at the other.
Plan the top and the openings. A story pole, a board marked with the tile rows, shows where each row will land at the underside of the cabinets, the ceiling, the top of a window or a niche. Shifting the start line by part of a row often turns a thin strip at the top into a reasonable cut. Outlets are also checked so the cover plates don't sit on an awkward joint. Our guide on how to install a backsplash covers outlets, box extenders and the countertop joint.
Handmade and glossy subway tile: lippage and light
Glossy glazed subway tile shows every edge. Light from a window or under-cabinet lighting skims across the wall at a low angle and picks out any tile that sits proud of its neighbours. A wall that looks fine at noon can look rough at night under task lighting. A flat wall is the first defence: high spots are knocked down and low spots filled before tiling.
Handmade and handmade-look subway tile adds another layer. These tiles vary in size, thickness and edge shape, and some of that variation is the point. They need a slightly wider joint than rectified tile so the differences have somewhere to go, and each tile is bedded individually. A running bond suits them best, because it hides small differences; a stacked layout puts every one on display. Some lippage is normal with genuinely handmade tile. Our guide to zellige tile covers the most extreme example.
With long, flat subway tile, levelling clips can help hold edges flush while the mortar sets, especially in a stacked or vertical layout. They don't make up for a wavy wall or the wrong offset.
Edges and subway tile grout colour
Most subway tile runs end somewhere other than an inside corner: at the side of a counter, beside a window, at the outside corner of a shower wall or partway up a wall. The cut edge shows the tile body and chips easily, so it needs a finish. A slim metal profile such as Schluter-JOLLY or RONDEC gives a crisp edge. Many ceramic subway lines include bullnose or pencil trim pieces with a glazed rounded edge, which suits a traditional look. Mitred corners work with porcelain whose body matches its face. Our guide to tile edge trim compares the options. Decide before tiling, because a profile is set into the mortar with the tile.
Grout colour changes how the pattern reads more than people expect. A grout matched to the tile, such as white on white, makes the wall read as one surface and softens the pattern. A contrasting grout, such as charcoal on white, outlines every tile and makes the running bond, stack or herringbone stand out. It also shows every uneven joint, so the layout has to be precise. A mid-tone grey hides kitchen splashes better than pure white. Behind a range or in a shower, a stain-resistant grout is worth considering; see grout types explained. Always choose from a cured grout sample beside the actual tile.
How the pattern changes labour and cost
Pattern affects the price in two ways: the tile you buy and the time it takes to set. A running bond or stacked layout of 3 × 6 tile is the most economical. Vertical layouts take a little longer, because tiles have to be held from sliding while the mortar sets. A 1/3 offset with long tile takes extra care with flatness. Herringbone, chevron and basketweave take much longer, with constant checking and angled cuts at every edge, and they need more extra tile.
The wall itself also matters: windows, outlets, open ends that need trim, a full-height wall and handmade tile all add time. Our guide to backsplash installation cost in Ottawa explains what drives the price of a backsplash, and a written quote should state the pattern so you can compare like with like. Agora installs subway tile on backsplashes, bathroom walls and showers across Ottawa.
Frequently asked questions
What is the most popular subway tile pattern?
The running bond, with each row offset by half a tile, is still the classic. Vertical stacked and herringbone are the most popular alternatives for a more modern or feature look.
Should subway tile be offset by half or a third?
Half suits short tiles such as 3 × 6. Longer subway tile is usually laid with a 1/3 offset to reduce uneven edges from slightly bowed tiles; check the maker's instructions for your tile.
Is 3 × 6 or 3 × 12 subway tile better?
Neither is better; they give different looks. 3 × 6 is traditional and suits every pattern. 3 × 12 looks sleeker with fewer joints but is more likely to need a 1/3 offset and a very flat wall.
What colour grout looks best with white subway tile?
White or light grey grout gives a soft, seamless look; charcoal outlines each tile for a bolder pattern. A mid-tone grey hides kitchen stains best.
Does vertical subway tile make a room look taller?
Yes. Vertical lines draw the eye up, so a vertical stack or vertical herringbone makes a wall or a low ceiling feel taller.
Is herringbone subway tile harder to install?
Yes. It is set out from a centre line, needs a precise starting angle and has angled cuts at every edge, so it takes more time and more extra tile than a running bond.
Where should you start laying subway tile?
From a level line about one tile up from the lowest point of the counter or tub, centred on the focal point such as the range, window or shower valve. The bottom row is cut to fit last.