

Subway & Brick Patterns
Classic running bond, stacked or vertical layouts in glossy, matte or handmade-look tile.
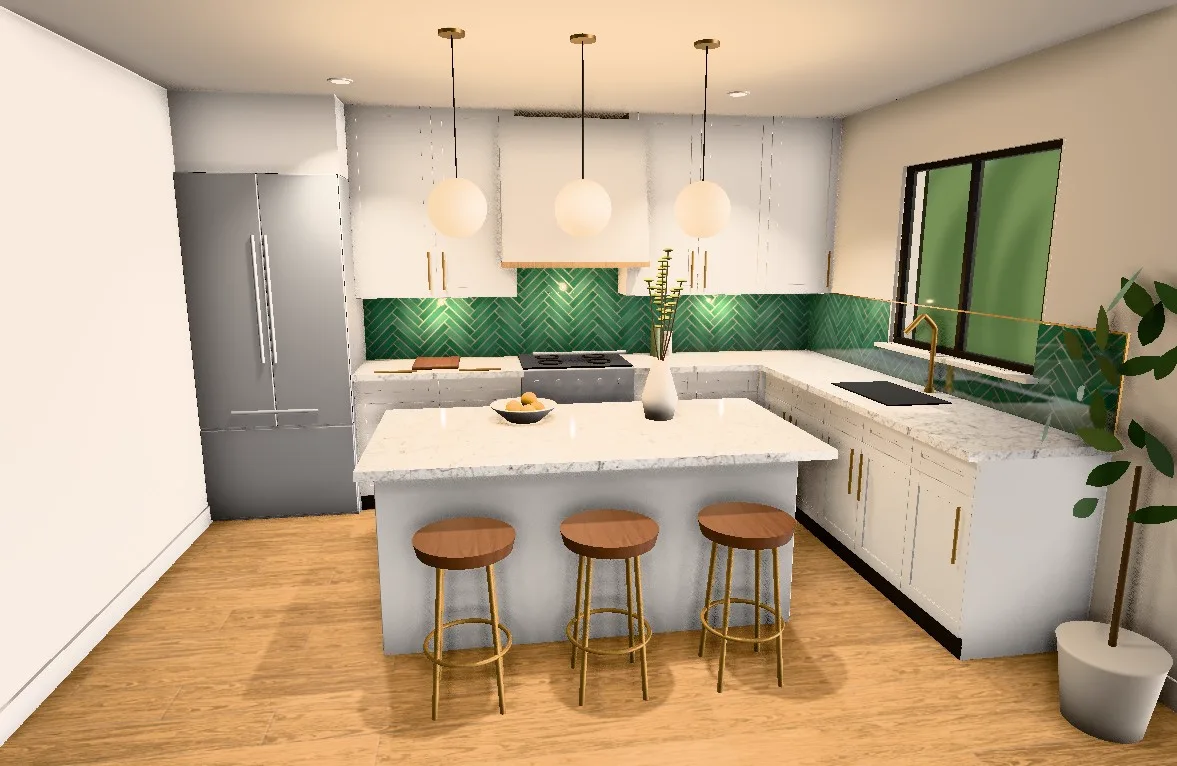
Subway, herringbone, mosaic, zellige-look and slab-look tile, laid out so the pattern is centred and every outlet, window and edge is cut cleanly.
At a glance
A backsplash is the tiled wall between the countertop and the upper cabinets, and behind the range and sink, that keeps water and grease off the drywall. Agora Flooring installs kitchen backsplashes in Ottawa and nearby towns, in subway, herringbone, mosaic, glass, zellige-look and slab-look tile, with the pattern centred and clean cuts around every outlet and window. A tiled backsplash in Ottawa typically starts at about $1,200, depending on the wall length, tile and pattern. Estimates are free, and every quote is written.
What We Install
A backsplash is small but seen every day. The difference is in the layout, the cuts and the edges.
Classic running bond, stacked or vertical layouts in glossy, matte or handmade-look tile.
Patterns set out from a centre line so they meet the range hood and window symmetrically.
Small-format and textured tile with the variation that makes a kitchen feel crafted.
Big porcelain panels for a near-seamless, easy-to-clean wall behind the range.
Metal edge profiles, mitred corners or bullnose tile where the backsplash ends, and tidy cuts around outlets and switches.
Epoxy or high-performance grout behind the stove and sink. See our grout guide.
Every outlet and switch opening is cut cleanly so the cover plates hide the edges. Boxes sometimes need extenders so the plates sit flush on the new tile; we point those out before we start.
The tile usually runs from the countertop to the underside of the upper cabinets, and to a set height or the ceiling on open walls. We plan where the pattern stops at windows, range hoods and the ends of the counter.
The wall behind a range takes heat and grease, so porcelain, ceramic and glass are the easiest to keep clean there. A full-height panel behind the range is a popular feature.
The wall needs to be flat, clean and sound. Uneven drywall is filled or skimmed, and old backsplash tile is removed where needed, so the new tile sits flat and the lines stay straight.
The joint between the countertop and the tile should be a flexible sealant rather than grout, because the two surfaces move differently and rigid grout cracks there.
Most kitchen backsplashes are set in a day and grouted once the mortar has cured. Larger or patterned backsplashes, like herringbone or zellige-look tile, take longer.
Good to Know
A backsplash is the wall finish behind a countertop. In a kitchen it is usually the strip of wall between the counter and the upper cabinets, plus the wall behind the range and the sink. It keeps water, grease and food off the drywall, and it closes the joint where the counter meets the wall. Most backsplashes are tile, because tile wipes clean, handles the heat behind a range and comes in a huge range of colours, sizes and patterns. A new kitchen tile backsplash is also one of the quickest ways to change how a kitchen looks without replacing the cabinets or the counters.
We install ceramic and porcelain wall tile, glass tile, mosaic sheets, natural stone and marble, zellige-look tile and large-format porcelain panels. Ceramic is the most affordable and the easiest to cut, which is why most subway tile is ceramic. Porcelain is denser and harder, and it is the usual choice for marble-look tile and slab-look panels. Glass and light stone are set in a white mortar so nothing shows through, and natural stone is sealed. If you are still choosing, our kitchen backsplash ideas guide compares the materials and patterns, and subway tile patterns shows the classic layouts.
A tile backsplash installation follows the same order on every kitchen. We protect the countertop, turn off the power to the kitchen outlets at the breaker, take off the cover plates and check the wall with a straightedge. Holes are patched and uneven drywall is filled or skimmed, so the tile sits flat and the lines stay straight under the cabinet lights. Then we mark a level line, because countertops are rarely perfectly level, and centre the layout on the range or the sink so the cuts at both ends match.
The tile is set in a cement-based thin-set suited to that tile, with spacers to keep the joints even. Every outlet, switch and window is cut so the cover plates and trim hide the edges, and exposed ends get a metal profile, bullnose or mitre as the tile goes on. Once the mortar has cured, we grout and then finish the joint at the countertop and the inside corners with a flexible sealant matched to the grout. Most kitchens take one to two days. The full process is in our guide on how to install a backsplash in the kitchen.
Our backsplash installation services cover the tile work from wall check to sealant. A backsplash also touches the work of several other trades, so it helps to know who does what before the day.
| Layout, cutting, setting and grout | Agora Flooring, as part of the backsplash tiling |
|---|---|
| Edge trim, bullnose or mitred ends | Agora Flooring, chosen with you before tiling |
| Sealant at the countertop and inside corners | Agora Flooring, after the grout has cured |
| Removing an old tile backsplash | Priced separately, once the wall can be seen |
| Countertop | The countertop company, installed before the backsplash |
| Moving, adding or rewiring outlets | A licensed electrician, with an ESA permit where required, before tiling |
| Pot filler or wall-mounted faucet | The plumber, roughed in before the wall is tiled |
| Painting above or beside the tile | The painter, after the tile is finished |
If the range, hood or under-cabinet lights have to come off for the tile, ask who will take them down and put them back, because that is usually outside a tile quote. Prices and what moves them are in our backsplash installation cost guide.
If you searched for backsplash installation near me or a backsplash tile contractor near you in the Ottawa area, this is where we work. We install kitchen backsplashes across Ottawa, including Kanata, Stittsville, Barrhaven, Nepean, Orléans, Gloucester and central Ottawa, and in nearby towns: Rockland, Embrun, Russell, Carleton Place, Almonte, Arnprior and Kemptville. Wherever you are, the first step is the same. We measure the walls on site, look at the outlets, windows and open ends, and give you a written quote. See all the areas we serve.
Beyond homes, we tiled the food-station backsplashes in the Teraanga Commons dining hall at Carleton University, a working kitchen where the tile has to stand up to constant cleaning. Bathroom vanity walls follow the same rules; see our vanity backsplash guide and bathroom tiling.
Subway tile is the classic and works in almost any kitchen. Zellige-look tile adds handmade texture, and large slab-look porcelain gives a seamless look with very few grout lines. Glass tile reflects light; natural stone looks warm but needs sealing and gentler cleaning behind the range.
The layout is usually centred on the range or the sink, so the pattern is balanced where the eye lands first, and it takes attention to detail at every edge. Full tiles go at the most visible ends, and cuts are hidden under cabinets or at the corners. Lines are kept level with the countertop and the window.
White or light grout with white subway tile gives a clean, classic look. A darker grout hides kitchen splashes better and makes the pattern stand out. Stain-resistant grout is worth it behind the stove and sink.
The countertop should be installed first, because the backsplash sits on top of it. It also helps to clear the counters, give us access to the outlets, and have the range and hood in place or their positions marked.
Wipe splashes with a soft cloth and a mild, pH-neutral cleaner. Avoid abrasive pads on glossy or glass tile, and reseal natural stone as its maker recommends.
Bring a countertop sample and a cabinet door colour when you choose tile. A busy stone countertop usually looks best with a quiet backsplash, and a plain counter can take a bolder pattern or colour.
Standard sizes in a straight or brick layout are the most affordable. If you love an expensive tile, use it as a feature behind the range and a simpler tile on the rest of the wall.
With open shelves or a chimney-style hood, the backsplash is often the main feature of the kitchen, so it usually runs higher, sometimes to the ceiling. We plan the layout so full tiles land around the shelves and the hood, and cuts are hidden where they are least visible.
The same tile can carry onto the back of an island, a bar wall or a coffee station to tie the kitchen together. These smaller areas are a good place for a bolder colour or pattern when you want a feature without tiling a whole wall.
Removing old tile usually damages the drywall behind it, so the wall is patched or the damaged section replaced before the new tile goes on. If the countertop is staying, we protect it during removal and keep the new tile tight to it.
Questions
A tiled kitchen backsplash in Ottawa typically starts at about $1,200, depending on the length of wall, the tile, the pattern and how many outlets, windows and edges need cutting and finishing. See the Ottawa cost guide.
After. The backsplash sits on top of the countertop, so the countertop is installed first and the tile starts from it. The joint between the countertop and the tile is finished with a flexible sealant rather than grout.
Behind a stove and sink, a stain-resistant grout such as epoxy or a high-performance cement grout is worth it, because it resists grease and food stains and is easier to keep clean.
Yes! Book a 3D design consultation and we'll render your own kitchen with the backsplash you're considering, in hyper-realistic detail.
A backsplash is the wall finish behind a countertop, usually the strip between the counter and the upper cabinets plus the wall behind the range and sink. It protects the drywall from water, grease and food, and finishes the joint where the counter meets the wall. In most kitchens it is tile.
Most kitchen backsplashes take one to two days: the tile is set first, then grouted and sealed at the countertop once the mortar has cured. Herringbone, mosaics, glass tile, a full-height wall or several window returns can add a day.
Yes. Many homeowners choose and buy their own tile. Tell us the tile and the wall sizes, and we can tell you how much to order, with extra for cuts, and which edge trim or bullnose pieces it needs.
Yes. Besides Ottawa, including Kanata, Stittsville, Barrhaven, Nepean and Orléans, we install backsplashes in Rockland, Embrun, Russell, Carleton Place, Almonte, Arnprior and Kemptville.
More in our guides: backsplash installation cost, backsplash installation step by step, kitchen backsplash ideas, flooring before or after cabinets, finishing tile edges, how to choose tile, herringbone layouts, grout types and tile installation cost.
Planning a kitchen: kitchen renovation steps, zellige tile, subway tile patterns and bathroom vanity backsplashes.
How We Work
When your flooring is in stock, we can usually install it the same week, so your project doesn't sit waiting for months.
Free estimates in person, by phone, by email or online. Tell us about the project, send photos if you have them, or book a visit and we'll measure on site.
We stand behind every installation with a workmanship warranty. Ask us what it covers for your project.
Our favourite part! See your room finished in hyper-realistic 3D before anything is installed. From $150, and the design fee is waived when you hire us. See the packages.
Free Estimate
Tell us about your kitchen and we’ll give you a free estimate in person, by phone, by email or online.