Short answer
Tile spacers hold an even gap between tiles while the mortar sets, but the right gap comes from the tile itself. Most rectified porcelain is set with a 1/16" to 1/8" joint, most pressed (non-rectified) tile with about 3/16", and industry guidance says a grout joint should never be narrower than 1/16". The joint width the tile maker recommends on the box or spec sheet wins over any rule of thumb.
Ask how wide grout lines should be and you will hear everything from "as thin as possible" to "a quarter inch". The honest answer depends on how consistent your tile is in size and shape. This guide explains how installers choose a grout line width, which tile spacers suit which job, when to pull them out, and why spacers on their own never make a straight floor.
What decides the grout joint width
No two tiles are exactly the same size. Each piece comes out of the kiln a little larger or smaller than the size on the box, and slightly out of square. The grout joint is where that difference goes. If the joint is too narrow, the variation has nowhere to hide, and the lines pinch, widen and drift across the room.
The first thing that matters is how the edges were made. Rectified tile is ground or cut to size after firing, so the pieces are very consistent and the edges are crisp and square. Pressed tile, also called calibrated or cushion-edge tile, is fired to size with no grinding. The pieces vary more and the edges are slightly rounded. Handmade tile and many natural stones vary more still. Our guide to porcelain vs ceramic tile explains how these bodies are made.
The second thing is the actual size range in your boxes. North American installation standards ask for a joint that is wider than the variation in the tile. The figure most often cited is a joint at least three times the tile's actual variation in face size, and never less than 1/16" (about 1.5 mm). So if the tiles in a shipment range by 1/16" from smallest to largest, the joint should be about 3/16". If they range by 1/32", a joint of about 3/32" to 1/8" fits.
In practice, the tile maker's recommended joint, printed on the box or spec sheet, is the starting point. A careful installer still lines up tiles from three or four boxes against a straightedge, because a batch can run differently from the showroom sample.
Typical grout line width by tile type
The table below shows typical grout joint sizes, not rules. Your tile's instructions and its measured size variation come first.
| Tile type | Typical joint | Why |
|---|---|---|
| Rectified porcelain, including large-format | 1/16" to 1/8" (1.5–3 mm) | Ground edges, tight size tolerance; planks often need 1/8" or more |
| Pressed or calibrated porcelain and ceramic | About 3/16" (5 mm), sometimes 1/8" to 1/4" | Size varies more; soft cushion edges |
| Glazed ceramic wall tile and subway tile | 1/16" to 1/8" | Often made to be set tight; some have small spacer lugs on the edges |
| Handmade and zellige-look tile | 1/8" to 1/4", or as the maker says | Irregular sizes and edges; some are made to be set tight |
| Mosaics on sheets | Set by the sheet, often about 1/16" to 1/8" | The joint between sheets must match the joints within each sheet |
| Polished, gauged natural stone (marble, granite) | 1/16" to 1/8" | Cut to tight tolerances; usually grouted with unsanded grout |
| Tumbled or uneven stone (travertine, slate) | 3/16" to 1/4" or more | Uneven edges and thickness |
| Quarry tile, terracotta and brick-look pavers | 1/4" or more | Large size variation and a rustic look |
Spacers are often sold in millimetres. As a rough guide, 1/16" is about 1.5 mm, 1/8" is about 3 mm, 3/16" is about 5 mm and 1/4" is about 6 mm. Pick the spacer that matches the joint you have chosen, not the other way round.
Why "no grout line" is a mistake
Many people want a seamless floor and ask for the tiles to be butted together with no joint at all. It is one of the few requests a good installer will push back on. Even rectified tile is not perfectly identical, and with no joint the small size differences add up from one tile to the next. By the far wall, the rows are crooked and the last tiles don't fit.
There are other problems too. With the edges touching, the slightest height difference shows as a sharp step, called lippage. Tiles pressed tight together chip at the edges, and mortar squeezes up into the hairline gap where grout can't reach. That gap collects dirt and can't be regrouted. And without grout locking them together, tiles rub and push against each other as the floor expands and contracts.
If you want a calm, nearly seamless look, there is a better route. Use rectified tile at a 1/16" or 1/8" joint, a grout colour that matches the tile, and larger tiles so there are fewer joints. Our large-format tile guide covers the floor flatness that look requires, and tile lippage and levelling systems explains why very tight joints make uneven edges more noticeable.
Types of tile spacers
Tile spacers are small plastic pieces that sit in the joints and hold the gap while the mortar sets. They are cheap, but each type has a job.
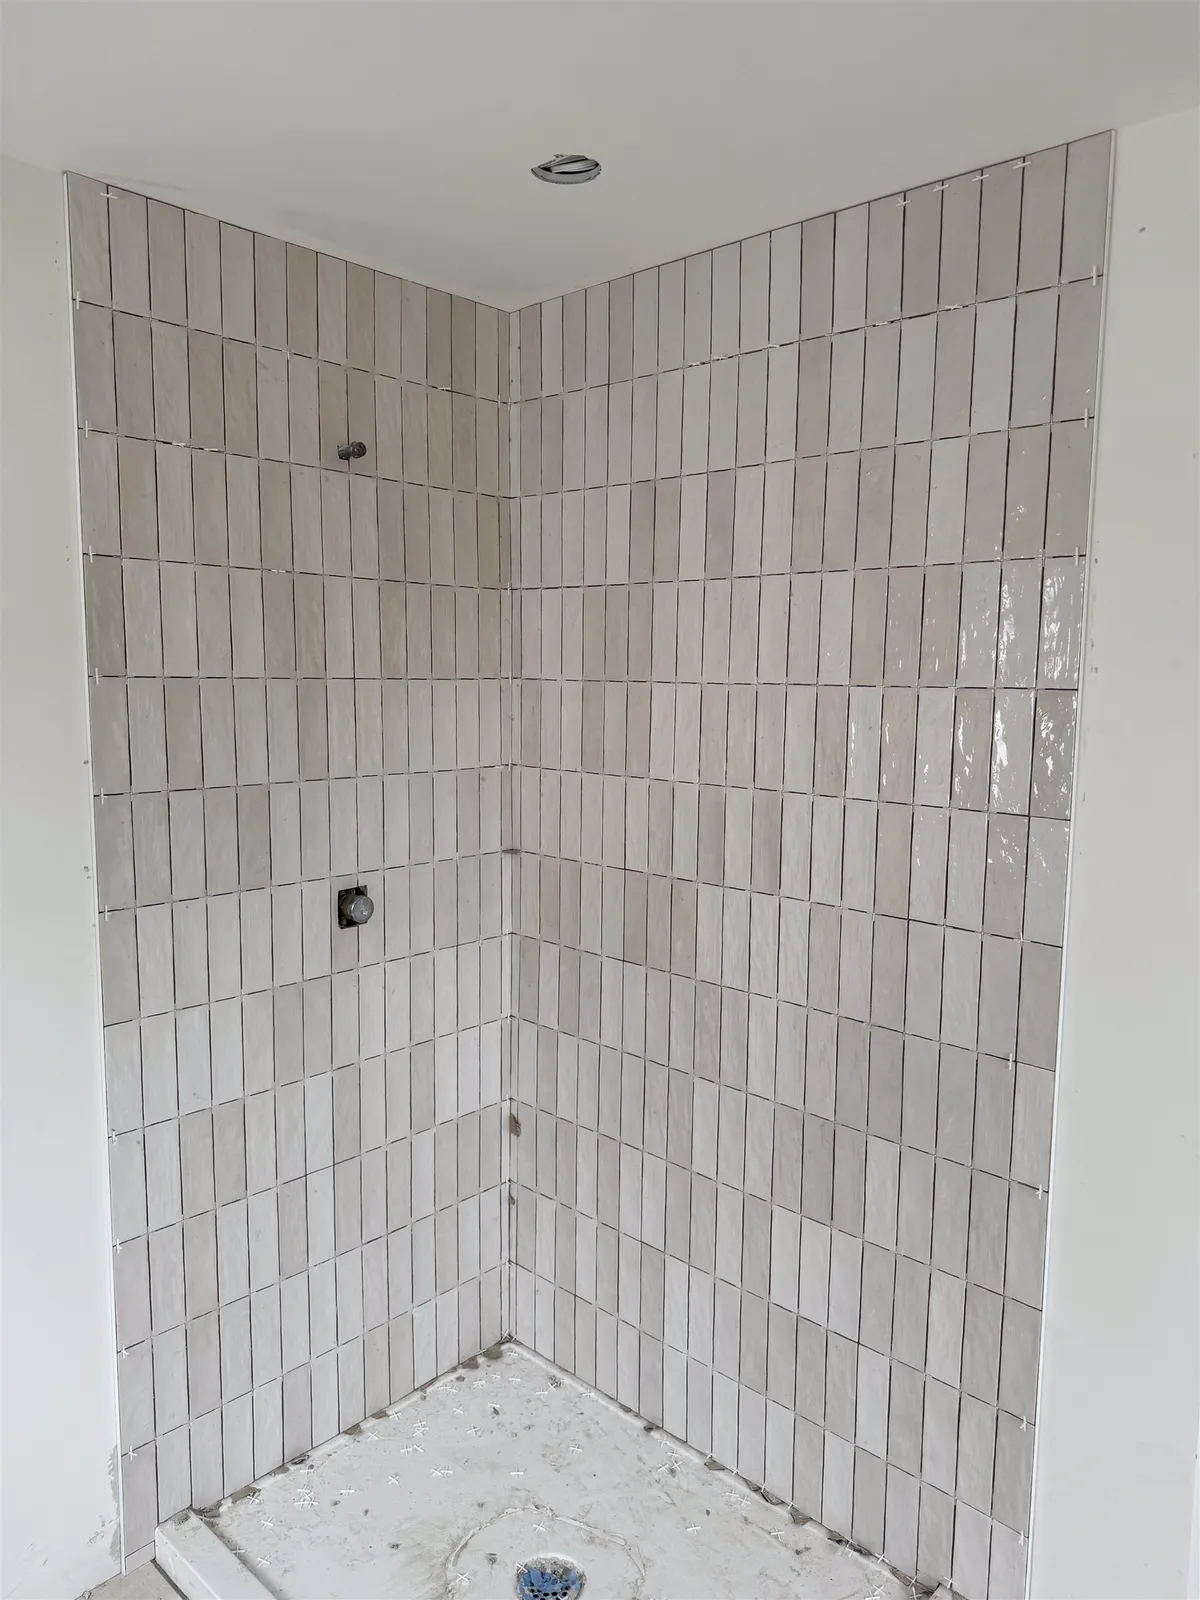
- Cross (plus) spacers sit where four tiles meet in a grid. They can lie flat in the corner or stand on edge in the joint, which makes them much easier to pull out.
- T spacers suit offset layouts, where three tiles meet. A cross spacer with one leg snapped off does the same job.
- Wedge spacers are tapered, so pushing them in further opens the joint. They help even out tiles that vary in size, and hold gaps on walls and at countertops.
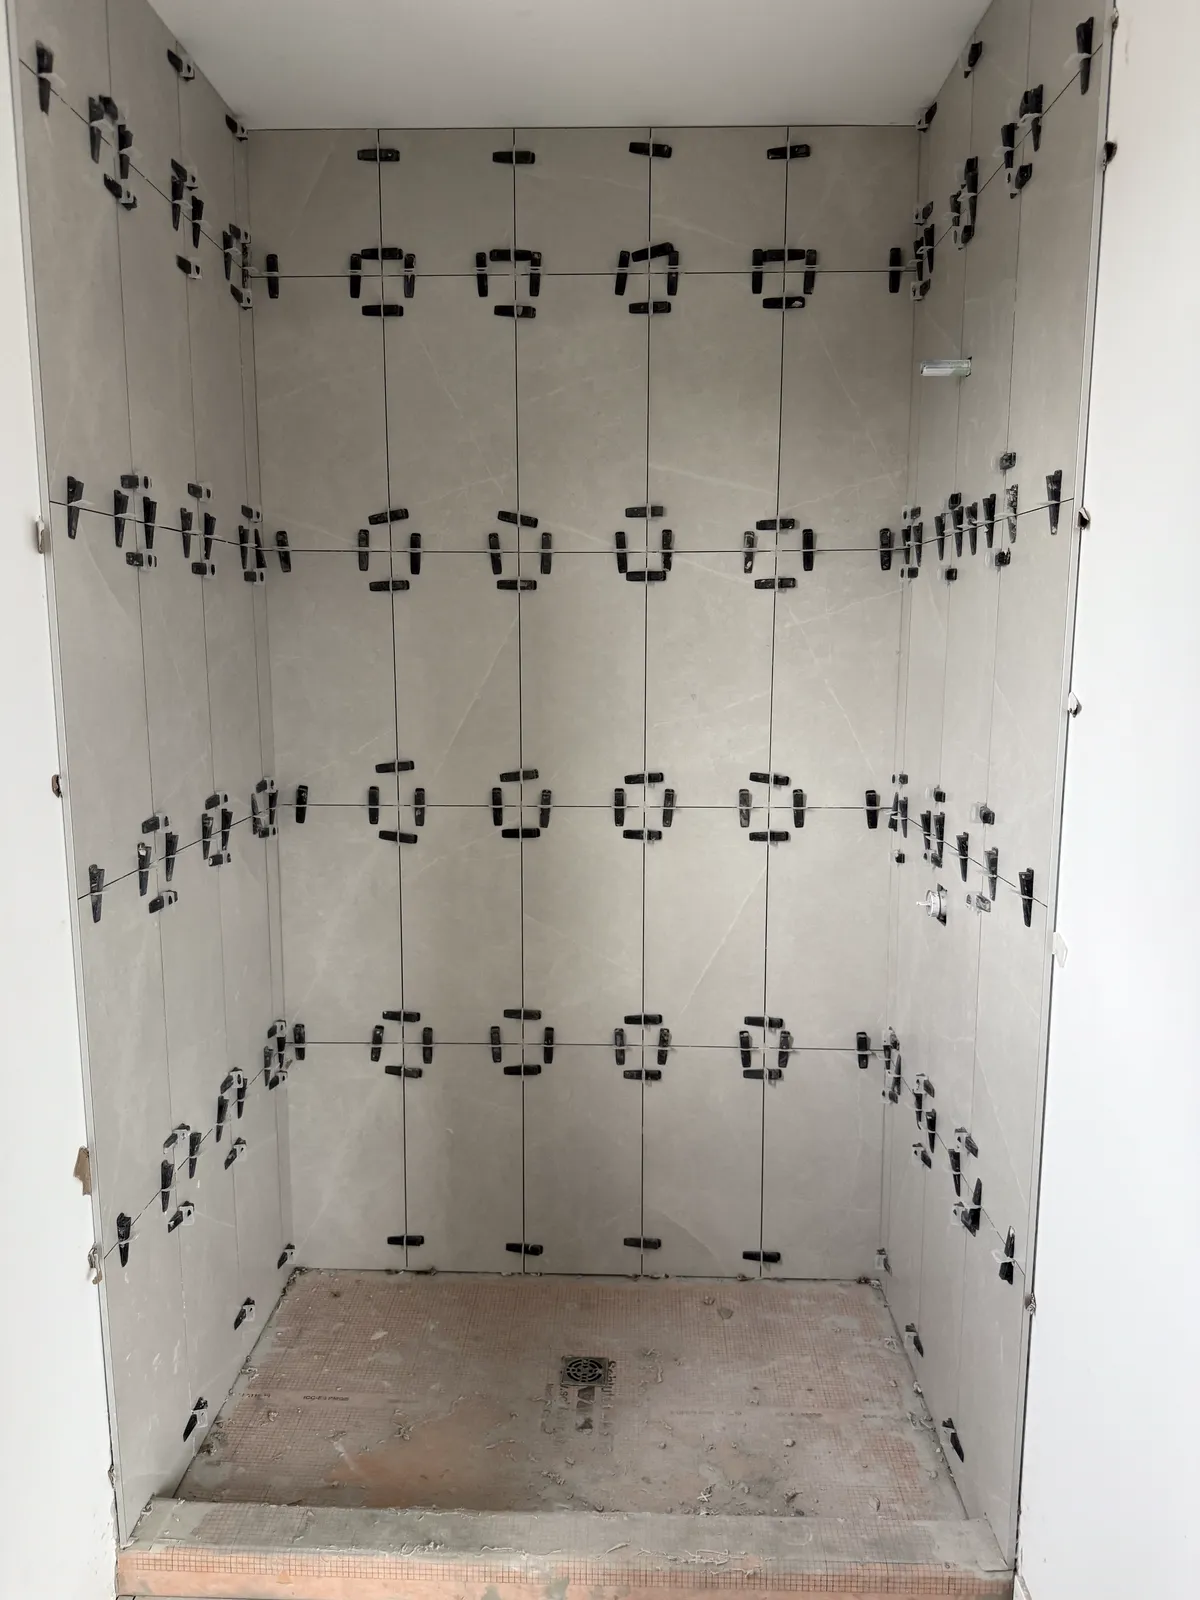
- Horseshoe shims are U-shaped and slide in from the side. They hold the first row of wall tile off a tub or floor, leaving a gap for sealant, and they shim tiles up where needed.
- Levelling clips hold neighbouring edges flush. The strap that passes between the tiles also acts as a spacer, so its thickness sets the joint.
Clip straps commonly come about 1/16" or 1/8" thick. For a wider joint, spacers or wedges go in as well. Clips help with flat edges, not straight lines.
When to remove tile spacers before grouting
Take spacers out before you grout. Some packaging says flat spacers can stay buried under the grout, but most installers remove them. The grout over a spacer is very thin. It cures differently from the grout around it, so it often shows as a lighter or darker spot, and it can crack because there is plastic underneath instead of a full, packed joint.
Timing matters. Spacers standing on edge are easiest to remove once the tiles are firm enough not to shift but the mortar is still soft. That is also the moment to rake squeezed-up mortar out of the joints, because hardened mortar leaves too little room for grout. A common rule of thumb is to keep at least two-thirds of the joint depth clear.
Levelling clips work differently. Their caps or wedges stay on until the mortar has set, usually overnight. The tops are then knocked off along the line of the joint so they break below the tile surface, and the base stays hidden under the grout.
Spacers don't make straight lines: layout does
This is the part most DIY floors get wrong. A spacer copies whatever the tile next to it does. If one tile is 1/32" larger than its neighbour, a rigid spacer pushes the whole row out by that much. Over ten or fifteen tiles those small errors add up, and the grout lines wander or form a slight wave.
Straight lines come from layout. Professionals set out control lines first: chalk lines, a laser or a tight string. On a floor, many installers snap a grid every few tiles and check each row against it. When tile varies in size, they "float" the joints, letting one joint run a hair wider or narrower so the lines stay straight. Your eye forgives a joint that is very slightly different. It does not forgive a crooked line across the room.
On walls, the reference line matters even more. Tubs and floors are rarely level, so the first row is set from a level line, often supported by a straight board screwed to the wall, rather than from the top of the tub. You can read more about setting out a floor in how to tile a floor, and about planning the pattern in tile patterns and layouts.
Grout joint size and grout type
The joint width also decides which grout you can use. The usual crossover between unsanded and sanded cement grout is around 1/8". Unsanded grout is for narrower joints, and sanded grout for joints of about 1/8" and wider. Every grout bag lists the joint range it is made for, and many high-performance and epoxy grouts cover a wide range in one product. Check the bag before you pick a spacer size.
Getting this wrong causes real problems. Unsanded grout in a wide joint shrinks as it cures and tends to crack. Sanded grout in a 1/16" joint can't be packed in properly, and the sand can scratch polished stone and glass during grouting. If your grout is cracking for no obvious reason, the wrong grout for the joint is one of the usual causes in why grout cracks.
Wider joints also mean more grout surface to keep clean. On a busy floor or a shower with a 3/16" joint, a stain-resistant grout earns its cost. Our guides to grout types and epoxy vs cement grout compare the options.
Grout joints on walls vs floors
Wall tile is often set with narrower joints than floor tile. Glazed ceramic and rectified wall tile are made to tight tolerances, and walls take no foot traffic, so 1/16" to 1/8" is common. Gravity is the main issue on a wall: spacers and wedges hold each tile while the mortar grabs and stop the rows from sagging.
Floor tile usually needs a little more room. Porcelain floor tile is often larger and may be pressed rather than rectified, and no floor is perfectly flat. A slightly wider joint hides small height differences and size variation better than a tight one. A typical floor joint is 1/8" to 3/16".
When the same tile runs from the floor up the wall, as it often does in a modern shower, use the same joint width on both. The grout lines can then carry around the corner and line up.
Joints, patterns and offsets
Patterns depend on consistent joints more than a straight grid does. In a running bond (brick) pattern, every other row has to line up vertically, so a joint that creeps wider in one row shows up two rows later. In a basketweave, two tiles side by side plus the joint between them must equal the length of one tile, so the joint width is decided by the tile size, not by preference.
Long plank tiles add another factor. Most have a slight bow, and offsetting them by half their length puts the high centre of one tile beside the low end of the next. Industry guidance commonly limits the offset to one-third for tile with a side longer than about 18", unless the maker says otherwise. A slightly wider joint, within the maker's range, also softens the small height differences that bowed planks create. Herringbone and chevron are the least forgiving of all, because each tile meets its neighbours at several points.
Grout colour and how wide joints look
Grout colour changes how wide your joints appear far more than a 1/16" difference in spacer size. A grout that matches the tile makes the joints nearly disappear, so a 3/16" joint can look quiet. A contrasting grout outlines every tile. White subway tile with charcoal grout reads as a bold grid, and even a narrow joint becomes a strong line.
Contrast also shows every flaw: a crooked line, a joint that pinches, or a mosaic sheet that sits slightly off. And grout usually dries lighter than it looks wet, so choose from a cured sample next to your actual tile, in the room's light. Our guide on how to choose tile covers sampling.
Mosaic sheets: keeping the joints consistent
Mosaics come on sheets with the joints already set. The challenge is the joint between the sheets. If it is wider or narrower than the joints inside each sheet, you see a grid of squares across the wall or floor, a common sign of a rushed job. The fix is care, not spacers. Each sheet is set so the gap to its neighbour matches the joints within it. The installer also steps back often to look for sheet lines while the mortar is still soft.
Sheets also stretch a little as they are handled, so pieces are nudged into line before the mortar sets. Our guide to mosaic tile installation covers the rest of the process.
Grout joints are not movement joints
A grout joint and a movement joint look similar but do different jobs. Grout is rigid and locks the tiles into one surface. A movement joint is filled with a flexible sealant, so the tile can expand and contract without cracking or lifting. Movement joints go at the perimeter of a floor, at inside corners and changes of plane, over joints in a concrete slab, and at intervals across large tiled areas.
Spacers don't create movement joints, and wider grout lines don't replace them. A floor with generous grout joints and no movement joints can still tent or crack, especially in sunrooms and over heated floors. See tile movement joints for where they go and how they are finished.
A quick checklist before the tile goes down
Settle the joint before setting starts, because it can't change halfway through a room.
- Read the tile maker's recommended joint on the box or spec sheet.
- Check a few tiles from different boxes for size and squareness.
- Choose the grout and colour, and confirm the bag covers that joint width.
- Match the spacer or clip thickness to the joint.
- Set control lines and dry-lay the first rows to check the cuts.
- Plan the movement joints at the perimeter and changes of plane.
If you are comparing installers, ask each one what joint width they plan and why. A clear answer that mentions the tile, the grout and the layout is a good sign. Our guide to hiring a tile installer lists other questions worth asking.
Frequently asked questions
What size tile spacers should I use for 12 × 24 tile?
For rectified 12 × 24 porcelain, most makers recommend about 1/16" to 1/8". Non-rectified 12 × 24 tile usually needs about 3/16". If you use levelling clips, the clip strap thickness sets the joint, so choose clips that match.
What is the smallest grout line you can have?
Industry guidance sets the minimum at 1/16" (about 1.5 mm), even for rectified tile. Narrower joints don't leave room for size variation or for grout to fill properly.
Should you leave tile spacers in when grouting?
No. Grout over a spacer is too thin, can crack and often shows as a different shade. Pull spacers once the tiles are firm and clean the mortar out of the joints at the same time.
Do you need spacers for subway tile?
Usually, yes, especially on walls, where spacers stop tiles sliding down. Some subway tile has small lugs on its edges that space it automatically; in that case extra spacers aren't needed.
How wide should grout lines be on a floor?
Typically 1/8" to 3/16" for floor tile, narrower for rectified tile and wider for pressed, handmade or rustic tile. The maker's recommendation on the box comes first.
Should a 1/8" joint get sanded or unsanded grout?
1/8" is the usual crossover point, so check the grout bag's joint range. Many installers use sanded or a high-performance grout at 1/8", but unsanded is safer on polished stone and glass, which sand can scratch.