Short answer
Cement tile, often called encaustic tile, is a pressed tile of coloured cement that is cured, not fired. It is porous, so it is sealed before grouting to stop the grout staining it, and sealed again afterwards. It needs a flat floor, full mortar coverage and pH-neutral cleaners, and it slowly develops a soft patina. Encaustic-look porcelain gives a similar pattern with almost no upkeep.
Cement tile has been laid in kitchens, halls and cafés for well over a century, and its bold patterns are back in fashion. A real cement tile floor has a soft, matte depth that printed tile only imitates. It also behaves very differently from porcelain. This guide explains how cement tile is made, how encaustic tile is laid out, sealed and installed, where it works, and when a patterned porcelain is the more practical choice.
What cement tile is and how it is made
Cement tile is made one piece at a time. A metal mould with dividers in the shape of the pattern sits on a steel plate. Coloured cement, usually a fine mix of cement, marble powder and pigment, is poured by hand into each section of the pattern. The mould is lifted, a backing layer of drier cement and sand goes on top, and the tile is pressed hard in a hydraulic press. It is then left to cure, rather than fired in a kiln like ceramic and porcelain.
The result is a tile with its pattern in a coloured layer on top, not printed on the surface. As the tile wears, the same pattern stays visible. Most cement tile is square, often around 8 × 8 inches, and noticeably thicker and heavier than most porcelain. Hexagons and other shapes are made too.
The name causes some confusion. "Encaustic" originally described fired clay tiles with a pattern inlaid in different-coloured clay. Today "encaustic tile" and "encaustic cement tile" are widely used for cement tile as well, and you may also hear "hydraulic tile". In most shops, all of these names point to the same cement product, or to porcelain made to look like it. Check the product type on the box or spec sheet.
Cement tile vs porcelain: the main differences
Because it is cement rather than fired clay, real cement tile is porous. It absorbs water, oil and pigment, much like natural stone. It reacts with acids, which etch its surface. It is softer than porcelain, so grit wears it over time. Porcelain, by comparison, absorbs almost no water and needs no sealing.
| Cement (encaustic) tile | Encaustic-look porcelain | |
|---|---|---|
| How it's made | Coloured cement, pressed and cured | Printed glaze on fired porcelain |
| Sealing | Before grouting, after grouting, and over time | Tile needs none |
| Stains and acids | Absorbs stains; acids etch it | Highly stain-resistant |
| Look over time | Develops a soft patina | Stays the same |
| Installation | Slower; face must be protected | Standard porcelain installation |
| Outdoors in Ottawa | Check the maker; usually not advised | Only if rated for exterior use |
Neither is better in every case. Cement tile is a material you live with and that changes with you. Porcelain is the one you can forget about. Our guide to porcelain vs ceramic tile explains why porcelain is so low-maintenance, and our guide on how to choose tile walks through the other choices.
Where cement tile works best
Bathroom floors and walls. Cement tile is a classic bathroom floor, and it suits powder rooms especially well, where traffic and water are light. In a full bathroom it works when sealed and kept sealed. As with all tile, the waterproofing is a membrane behind or under the tile, not the tile itself; see how to waterproof a shower.
Showers. Cement tile can be used on shower walls and floors, but this is where it needs the most care. Soap, shampoo and hard water build up on its surface, and many cleaners are acidic. Many people choose cement tile for the bathroom floor and porcelain or ceramic inside the shower, or a porcelain look-alike throughout.
Kitchens. Cement tile looks right in a kitchen, on the floor or as a backsplash. Oil, wine, lemon and tomato are its enemies, so spills are wiped quickly and the sealer is kept up. On a backsplash, the area behind the cooktop takes the most splatter. Our kitchen backsplash ideas show other patterned options.
Entries and halls. A patterned entry floor is a beautiful first impression. In Ottawa, though, the front entry gets salt, sand and slush all winter, and grit wears the softer cement surface faster. Sealed cement tile with good mats can work. A busy front door is usually easier with porcelain; our entryway tile guide compares the options.
Outdoors. Most cement tile makers don't recommend their tile where it freezes wet. For an Ottawa patio, choose porcelain rated for exterior use.
Laying out a cement tile pattern
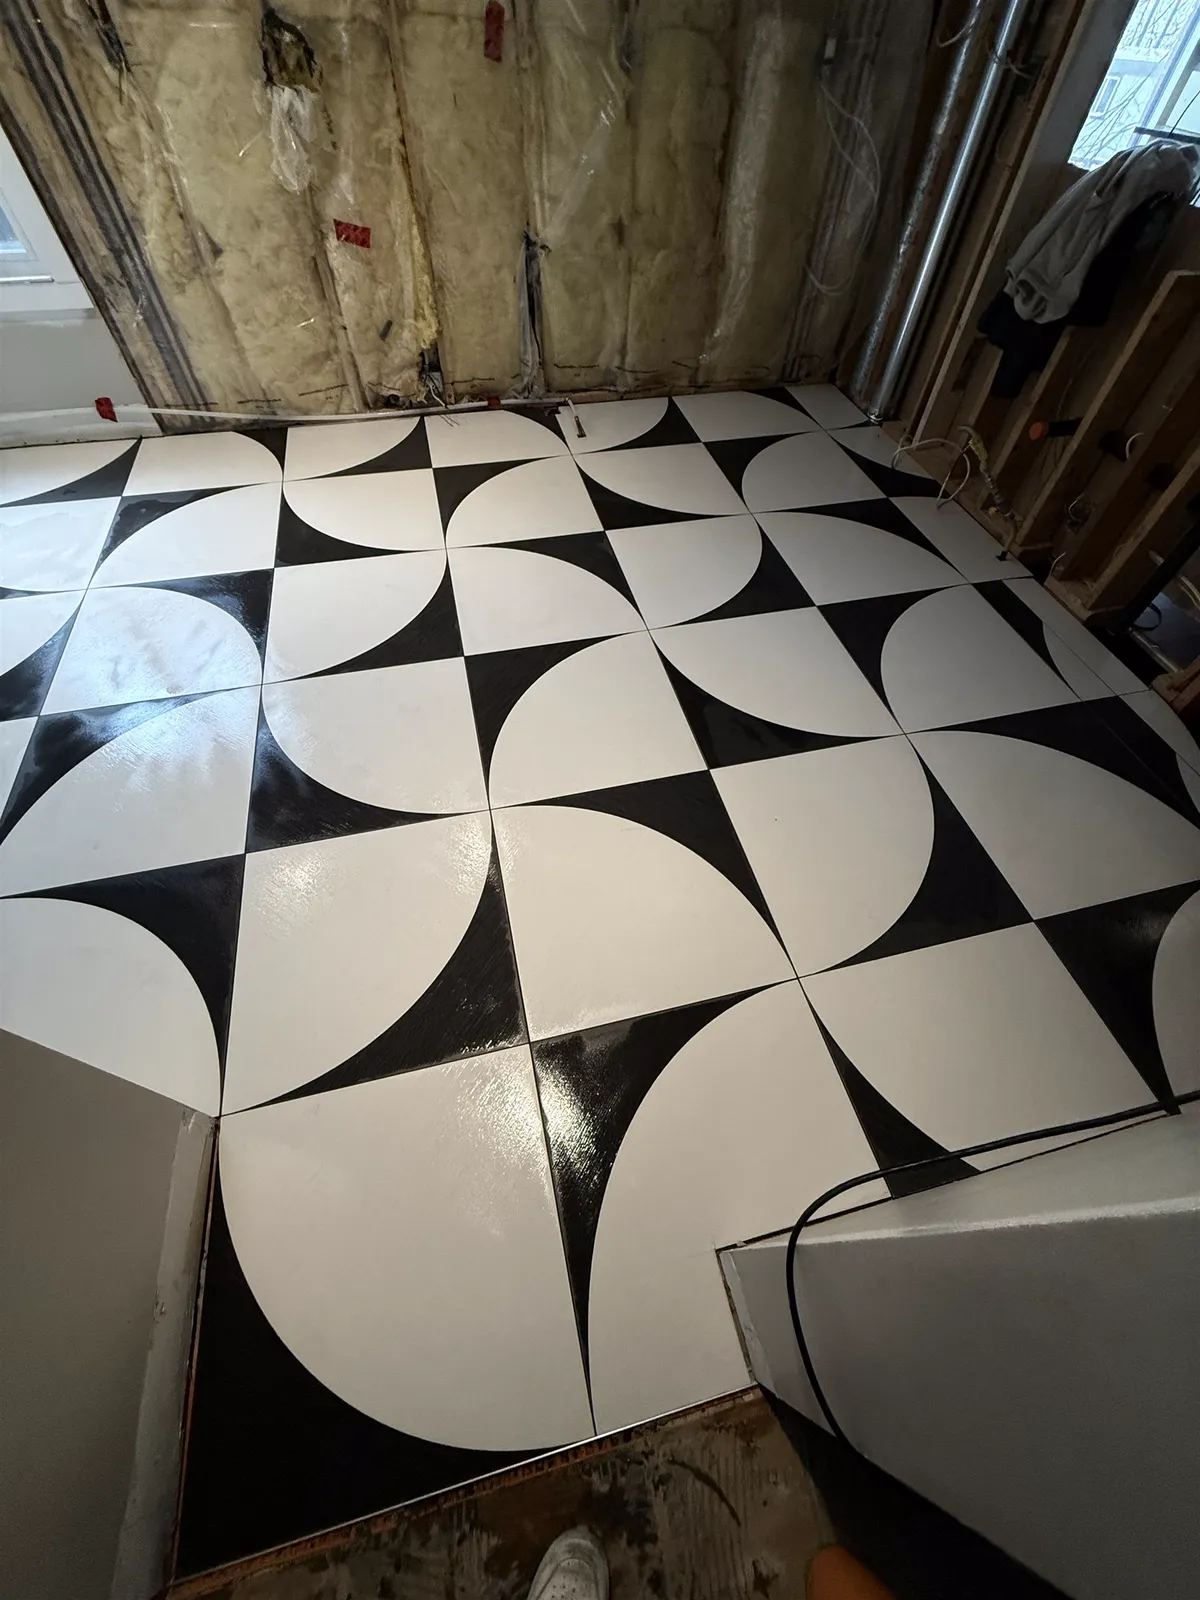
Most cement tile patterns are designed so the full motif appears only when four tiles, or more, come together. A single tile may show a quarter of a flower or a corner of a star. The layout decides where those full motifs land, which makes planning more important than with plain tile.
Start from the centre of the room, or from the main doorway, so the pattern is balanced where people look. Dry-lay the tiles across the room before any mortar is mixed. This shows where the pattern breaks at the walls and lets you shift the layout so cut motifs land in less visible places, such as under a vanity or along a cabinet run. Rotating the same tile can create several different patterns, so lay out options and photograph them before deciding.
Borders are a common way to frame a cement tile floor. A plain or patterned border tile runs around the room, with matching corner pieces, and the field pattern sits inside it. A border also hides an out-of-square wall, because the field is set square and the cuts go into the plain tile at the wall. Our guide to tile patterns and layouts covers how patterns are planned.
Cement tile is handmade, so colour varies slightly from batch to batch and tile to tile. Buy from one batch, mix tiles from several boxes as you go, and order extra for cuts, breakage and future repairs. Our guide to how much tile you need explains how to work out the overage for patterned layouts.
Preparing the floor for cement tile
Cement tile is pressed flat, and its face can't be ground down after installation without cutting into the pattern. So the floor underneath has to be flat. Dips are filled and humps ground before setting, often with a self-levelling compound on uneven areas.
The floor also has to be stiff. Industry guidance limits deflection over wood framing to L/360 for ceramic and porcelain tile. Cement tile needs at least that, and its maker's instructions may ask for more. An uncoupling membrane over wood subfloors is common. Our guide to the right subfloor for tile explains each check.
Installing cement tile: mortar, coverage and protecting the face
Most cement tile makers publish their own installation instructions, and they are worth following closely. In general, the tile is set in a polymer-modified thin-set mortar, using the type the maker recommends. The floor is combed with a notched trowel, each tile is back-buttered with a thin coat to fill its back, and the tile is pressed into place. Full, even coverage matters. Industry standards call for at least 80% contact in dry areas and 95% in wet areas, and a thick, heavy tile with hollows under it can crack.
The face of the tile needs protection throughout. Thin-set on the face can stain unsealed cement tile, so it is wiped off right away with clean water and a soft cloth. Many installers apply a first coat of sealer before setting, as the maker allows, so the face resists mortar and dirt from the start. Tiles are set by hand and tapped gently, never hammered hard.
Spacers and levelling clips need some care. Their edges press against the soft face and can leave marks or rub off colour if they are forced or left in too long. Check the maker's instructions before using a clip system, and pull spacers once the mortar has set enough to hold the tiles.
Cut cement tile on a wet saw with a sharp diamond blade, slowly, to avoid chipping the coloured layer at the edge. Wet cutting keeps the dust down; wear a respirator and eye and hearing protection. Keep cut tiles clean of slurry, which can stain the face.
Sealing cement tile before grouting
This is the step that makes or ruins a cement tile floor. Grout is full of pigment, and unsealed cement tile soaks it up. A dark grout on light tile can leave a permanent haze or a stained frame around every tile. Even a light grout can dull the colours.
So the tile is sealed before grouting. Once the mortar has set and the tiles are clean and dry, a penetrating sealer the tile maker recommends is applied in thin coats. More coats follow until the tile stops absorbing it, as the maker directs. The sealer is allowed to dry fully before grouting starts. Some cement tile arrives with a factory treatment, but most makers still ask for sealing on site.
Testing saves trouble. Seal a spare tile, grout a small area of it, and clean it off. If the grout stains, the tile needs more sealer or a lighter grout.
Grouting cement tile
Cement tile is usually set with narrow joints, which suit its crisp, square edges and keep the pattern reading as one surface. Many makers recommend unsanded grout, because sand can scratch the soft face. Follow the maker's joint width and grout type. Our guide to grout types explains the difference between sanded, unsanded and high-performance grouts.
Grout colour is usually chosen to match the lightest colour in the tile, or a soft mid-tone, so it doesn't fight the pattern. Very dark grout is risky on light tile, even when sealed. Grout is worked in with a soft float and cleaned promptly with a damp sponge and clean water, working gently so the sponge doesn't drag grout across the face. Never use an acid-based grout haze remover on cement tile, because it etches the surface.
Final sealing, stains, etching and patina
Once the grout has cured, the tile and grout are sealed again together. The grout maker decides how long to wait; our guide to sealing grout covers the timing. After that, reseal when water stops beading on the surface. Kitchens, bathrooms and entries need it more often than low-traffic rooms.
Daily care is like natural stone. Sweep or vacuum grit, damp-mop with a pH-neutral cleaner, and wipe spills quickly. Vinegar, lemon, wine and many bathroom cleaners etch cement, leaving dull, rough marks. Oil and coffee stain it if they sit. Our guide to natural stone care describes the water test and the difference between etching and staining, and the same habits suit cement tile.
Over time, cement tile develops a patina. The surface softens a little, the colours mellow and small marks blend in. Many people love this. It is part of why old cement tile floors in Europe and Latin America look the way they do. If you want a floor that looks exactly the same in years to come, porcelain is the better fit.
Encaustic-look porcelain: the easy-care option
Much of the patterned floor tile sold today is porcelain printed to look like cement tile. The pattern is part of a glaze fired onto the tile, so it doesn't stain, doesn't need sealing and can go anywhere porcelain goes, including shower floors with a suitable slip rating and, if rated for exterior use, outdoors.
The look is a little flatter than real cement, with a thin print rather than a coloured layer. Many collections offer a dozen or more patterns that mix randomly, which is hard to do with cement tile. Porcelain is also thinner and lighter, and it installs like any other porcelain floor. For a busy family bathroom, a front entry or a rental, it is often the sensible choice.
Is cement tile a DIY job, and what drives the cost?
Cement tile is less forgiving than porcelain. Stained grout, mortar on the face, a missed sealing coat or a pattern that breaks badly at the doorway are hard to fix once they happen. A small powder room floor is within reach for a careful DIYer who follows the maker's instructions exactly. Larger floors, kitchens and bathrooms with complex patterns benefit from an experienced installer.
The cost depends on the tile itself, the area, the pattern and border layout, floor preparation, and the extra steps cement tile needs: sealing before and after grouting and slower, more careful setting. Our guide to tile installation cost in Ottawa explains how these add up. Agora installs both cement tile and patterned porcelain through our tile installation service, and a 3D design consultation can show a pattern in your own room before you order.
Frequently asked questions
What is the difference between cement tile and encaustic tile?
Today the names are mostly used for the same thing: a pressed, cured tile with a coloured cement pattern on top. Strictly, "encaustic" first meant fired clay tiles with inlaid patterns, and the term is also used for porcelain made to look like cement tile.
Does cement tile need to be sealed?
Yes. It is sealed before grouting so the grout doesn't stain it, sealed again after the grout cures, and resealed when water stops beading on the surface.
Can you use cement tile in a shower?
It can be done with a proper waterproofing membrane and regular resealing, but it needs more care than porcelain. Many people use it on the bathroom floor and porcelain inside the shower.
Does cement tile stain easily?
Unsealed, yes. Sealed and kept sealed, it resists most stains if spills are wiped up quickly. Acids such as vinegar, lemon and wine etch it regardless of the sealer.
What grout should I use with cement tile?
Usually an unsanded grout in a narrow joint, in a colour close to the lightest tone of the tile, but follow the tile maker's instructions. Test the grout on a sealed spare tile first.
Is cement tile or porcelain better?
Cement tile has more depth and develops a patina, but needs sealing and gentle care. Porcelain looks similar, needs no sealing and suits busy floors, showers and entries better.