Short answer
How to install engineered hardwood depends on the subfloor and the product: it can be nailed or stapled to a wood subfloor, glued down to concrete or wood, or floated over an approved underlay. Solid hardwood is nailed to a wood subfloor and doesn't go below grade or directly on concrete. Whatever the method, check that the wood and subfloor moisture readings are within the maker's limits, make the subfloor flat and solid, mix boards from several boxes, and leave expansion space at every wall under the baseboard.
A hardwood floor is real wood, and wood moves with the moisture in the air. That one fact explains almost every step of a good installation, from letting the boards adjust to the house, to the gap left at the walls. This guide explains how to install engineered hardwood and solid hardwood by each of the three methods, in the order the work is done. If you haven't chosen yet, read engineered vs solid hardwood first, because the product decides which methods you can use.
Choosing the installation method
There are three ways to install a hardwood floor, and the maker's instructions say which ones are allowed for each product. Many engineered floors allow more than one.
| Nail or staple-down | Glue-down | Floating | |
|---|---|---|---|
| Products | Solid, and many engineered | Engineered | Engineered made for floating |
| Subfloor | Plywood or OSB | Concrete or wood | Concrete or wood, over an underlay |
| Feel and sound | Solid, traditional | Solid and quiet | Can sound hollower |
| Below grade | No | Engineered rated for it | Engineered rated for it |
| Main skill | Nailing schedule, tight rows | Adhesive, trowel, clean work | Flat subfloor, expansion gaps |
Nail-down hardwood is the classic method for main floors and upstairs on a wood subfloor. Glue-down is the usual way to put engineered hardwood on concrete, and it gives the most solid feel there. A floating engineered hardwood floor is the quickest to install and works on most flat subfloors, but it sounds more hollow and is the least forgiving of dips. In condos, the building's sound rules often decide the method and the underlay; see condo flooring rules.
Moisture and acclimation
Most hardwood failures start with moisture. Wood installed too wet shrinks and gaps when it dries out. Wood installed too dry swells and cups or buckles when it takes on moisture. The goal is for the boards and the subfloor to be close to the conditions the floor will live in.
That is why installers use a moisture meter. They read several boards from different boxes and several spots on the subfloor, and compare the numbers with the maker's limits. Most makers allow only a small difference between the wood and a wood subfloor, and they set separate limits for concrete, which is tested by its own method. If the readings are outside the limits, the job waits. Many makers also ask for the boards to sit in the home for a set time before installing, and some engineered products need little or none. Follow the instructions for your product rather than a general rule.
Ottawa makes this matter more than most places. Indoor air swings from very dry in winter to humid in summer, and makers commonly ask for indoor humidity around 35 to 55 percent. The house should be at normal living conditions before the wood arrives: heating or air conditioning running, windows in, and drywall, paint and concrete work dry. Our guide to hardwood through an Ottawa winter explains seasonal gaps and cupping.
Where hardwood can and can't go
Solid hardwood is not for basements or directly on concrete. Moisture from the slab and the cooler, damper air below grade make it swell, cup and gap, and most solid hardwood makers don't approve it there. Engineered hardwood can work on concrete and below grade, but only when the maker approves that product for it and the slab passes the moisture test. For many basements, a wood-look vinyl plank is the safer choice; see best basement flooring.
Kitchens are common for hardwood, with care at the sink and dishwasher. Full bathrooms are not a good place for wood. In kitchens, also decide whether the floor goes in before or after the cabinets; see flooring before or after cabinets.
Subfloor preparation
The subfloor has to be flat, sound and dry. On a wood subfloor, that starts with fixing squeaks: screw loose plywood or OSB panels down to the joists, and replace any damaged or delaminated panels. A floor that moves underfoot before the hardwood goes in will squeak afterwards. The maker sets the minimum subfloor type and thickness for nail-down installation, so check it against what is in the house.
Flatness matters for every method and most of all for floating and glue-down floors. Makers commonly specify a tolerance around 3/16" in 10 ft; check your product's figure. Sand or plane high seams on wood, fill low spots with a patch made for the subfloor, and use self-levelling compound on concrete that is out of flat over a wide area. Then vacuum thoroughly.
For nail-down floors, many makers call for a vapour retarder over the wood subfloor, such as an asphalt-saturated felt or a specified underlayment paper, laid in overlapping rows. For floating floors, use the underlay the maker approves, with a vapour barrier over concrete. For glue-down floors on concrete, the adhesive system and the slab's moisture test decide whether a separate moisture barrier is needed.
How to install engineered hardwood: layout and racking
For nail-down floors, run the boards across the floor joists wherever you can. A board running parallel to the joists sits on the subfloor between them, where it is weaker, and many makers then require added subfloor thickness or reinforcement. For glue-down and floating floors, the joist direction matters less, and the boards usually run parallel to the longest wall or toward the main light source. Keep one direction through connected rooms and down the length of hallways.
Start from the longest straight wall, usually an outside wall. Measure out from it at both ends, allow for the expansion space, and snap a chalk line. The first row is set to the line, not to the wall, because walls are rarely straight. Check the far wall too, so the last row isn't a narrow sliver.
Before installing, rack out the floor: lay several rows loose from at least three or four boxes. Wood varies from board to board in colour and grain, and boxes can run lighter or darker. Mixing them spreads the variation evenly so you don't get a dark patch in one corner. Racking also lets you control the end joints. Keep them offset by at least the minimum the maker sets, avoid H-joints and stair-step patterns, and spread short boards out rather than clustering them. Set aside boards with defects for closets or cut pieces.
Expansion space at the perimeter
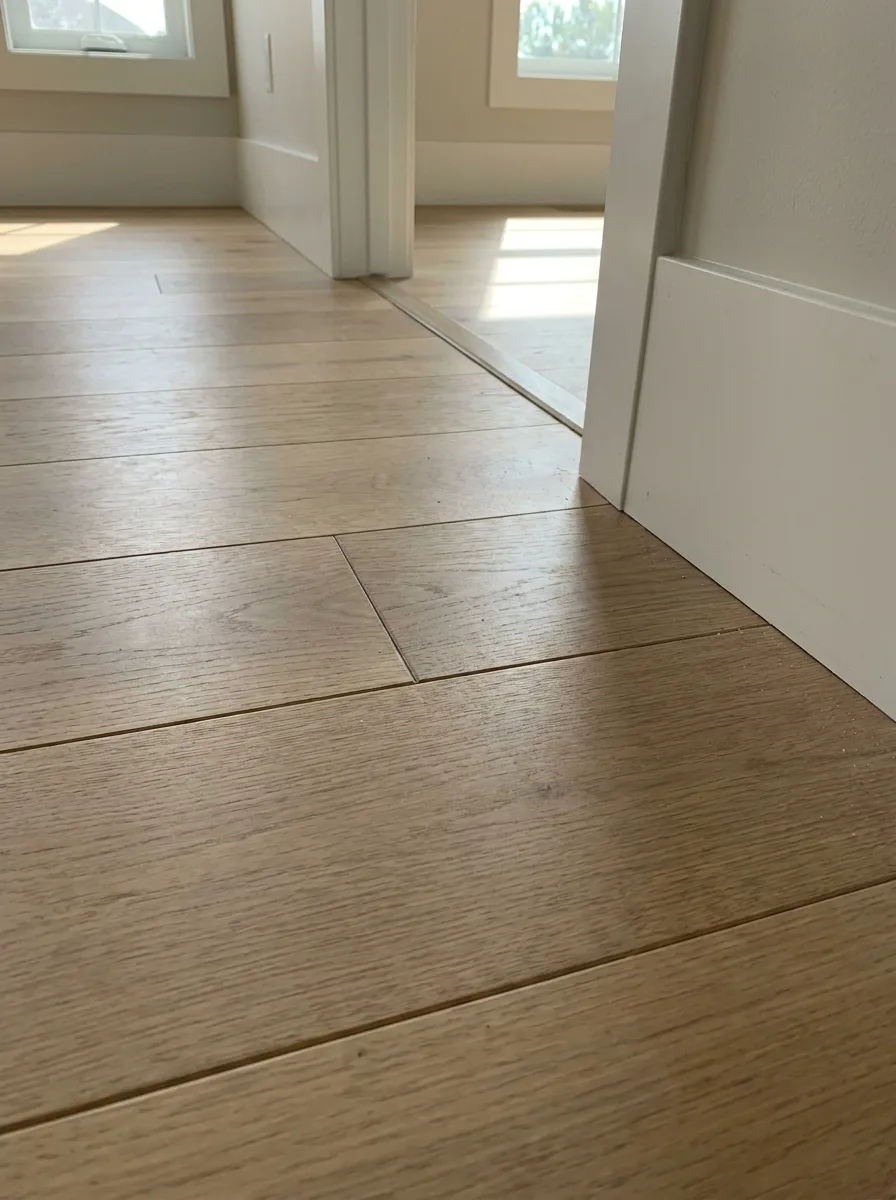
Wood expands across its width as it takes on moisture, and a whole floor of boards adds up to real movement. Every hardwood floor needs expansion space at the walls and around fixed objects: door jambs, stairs, hearths, pipes and the edges of tile floors. The size depends on the product and the method, and the maker sets it. The space is hidden under baseboard, quarter round or a transition.
Undercut door casings and jambs with a jamb saw, using a scrap board on any underlay as the height guide, so the wood slides under the casing and the gap stays hidden. A floor installed tight to the walls has nowhere to go in a humid August and can cup, push up or buckle.
Nail-down hardwood: blind nailing and the nailing schedule
Nail-down hardwood is fastened with a flooring nailer that drives a cleat or staple at an angle through the tongue of each board, where the next board hides it. That is called blind nailing. The maker sets the fastener type and length and the spacing along each board, including how close to the end of each board the first fastener goes. Using the wrong fastener or skipping fasteners is a common cause of squeaks and movement.
The first and last rows are too close to the wall for the nailer. They are face-nailed: nailed down through the face near the wall, where the baseboard covers the nail, or pre-drilled and nailed through the face with the holes filled with matching putty. Some installers also glue the first row for extra hold. Work row by row, drawing each board tight with a block before nailing, and check the rows stay straight every few feet.
Glue-down: how to install engineered hardwood on concrete
Glue-down engineered hardwood on concrete is bonded across the whole floor with the adhesive the flooring maker approves. Spread it with the trowel notch the adhesive maker lists, because the notch controls how much adhesive goes down. Some urethane adhesives also act as a moisture barrier over a slab, within the moisture limits they publish; others need a separate barrier coat. Check the combination before you start. Many engineered floors can also be glued to a wood subfloor where the maker allows it.
Work in sections within the adhesive's open time. Press each board into full contact and lift one now and then to check the transfer on its back. Hold the rows straight and tight with blue painter's tape where the maker allows it, and wipe any adhesive off the finish right away with the cleaner the adhesive maker recommends. Dried urethane is very hard to remove. Keep traffic off the floor for the time the adhesive needs to cure.
Floating engineered hardwood
A floating engineered hardwood floor isn't fastened down at all. The boards connect to each other, either with a click-lock joint or with glue run along the tongue and groove, and the whole floor sits on an underlay. Use the underlay the maker approves, a single layer, with a vapour barrier over concrete. Our underlay guide explains why stacking pads causes trouble.
Because the floor moves as one piece, it needs the expansion space at every wall and fixed object, and it must not be pinned by kitchen islands, heavy built-ins or trim nailed into it. Many makers set a maximum floor size before an expansion break is needed. Flatness matters more for floating than for any other method, because a board over a dip flexes and sounds hollow.
Transitions, stairs and finishing
At doorways, hardwood meets tile, carpet or vinyl with a reducer, T-moulding or threshold, usually made to match the floor. The heights of both floors should be checked before the wood is ordered. Our guide to floor transition strips explains each type. On stairs, every tread and riser is cut and fastened, with a matching nosing at the front edge; see stair nosing.
Most floors today are prefinished, with a factory finish that can be walked on as soon as the floor is installed. Site-finished hardwood is installed raw, then sanded, stained if wanted, and coated with several coats of finish on site. That is a separate trade step with its own dust, drying times and ventilation, so plan the schedule around it.
The last step is trim. Baseboard and quarter round are nailed to the wall, not down into the floor, so the wood can still move. Our guide to quarter round vs baseboard compares the two.
Heated floors under hardwood
Radiant heat under hardwood is possible only where both the flooring maker and the heating maker allow it. Engineered hardwood is approved over heat more often than solid, usually with a maximum surface temperature, gradual start-up and an approved heating type. Wood also slows heat more than tile does. See are heated floors worth it before you combine them.
How long hardwood installation takes
Once the wood is acclimated and the readings are good, a typical 400 to 600 sq ft main floor usually takes two to four days. Subfloor levelling, stairs and many transitions add time, and glue-down floors need cure time before furniture goes back. Site finishing adds several more days. Our installation checklist covers what to arrange beforehand.
Common hardwood installation mistakes
- Installing without moisture readings, or before the house is at living conditions.
- Not enough expansion space, so the floor cups or buckles in summer.
- Skipping squeak repairs in the subfloor.
- Using one box at a time, which leaves patches of colour.
- Too few fasteners, or the wrong ones.
- Solid hardwood below grade or on concrete.
- A floating floor pinned under an island or by trim.
How to install a hardwood floor yourself, or hire a pro
A floating engineered floor in a simple room is within reach for a careful DIYer. Nail-down and glue-down hardwood take more skill and tools: a flooring nailer and the right fasteners, a moisture meter, and practice keeping rows tight and adhesive off the finish. Hardwood also costs more per board than vinyl or laminate, so mistakes cost more.
Installation labour for hardwood runs about $3.50 to $6.25 per sq ft, according to the average of the published 2026 price ranges of four Ottawa flooring companies; see flooring cost in Ottawa. Agora gives free estimates and a written quote, and we check the subfloor before any wood is ordered. See our hardwood flooring installation page.
Frequently asked questions
Can engineered hardwood be installed on concrete?
Yes, if the maker approves that product for concrete. It is usually glued down with an approved adhesive or floated over an underlay with a vapour barrier, after the slab passes the moisture test.
Is it better to float or glue engineered hardwood?
Glue-down feels more solid and sounds quieter. Floating is faster and avoids adhesive, but it needs a very flat subfloor and can sound hollow. The maker's instructions and, in condos, the building's sound rules often decide.
Which direction should hardwood be installed?
For nail-down floors, across the floor joists where possible. Otherwise, usually parallel to the longest wall or toward the main light source, and the same way through connected rooms.
Do you need to acclimate engineered hardwood?
Follow the maker. Some engineered products need little or no acclimation, while others ask for a set time in the home. In all cases, the moisture readings of the wood and subfloor should be within the maker's limits.
Can you nail down engineered hardwood?
Many engineered floors can be nailed or stapled to a plywood or OSB subfloor, using the fastener type and spacing the maker lists. Some thinner products are glue-down or floating only.
Can solid hardwood go in a basement?
No. Solid hardwood is not recommended below grade or directly on concrete. Engineered hardwood rated for below grade, or vinyl plank, is the better choice.