Short answer
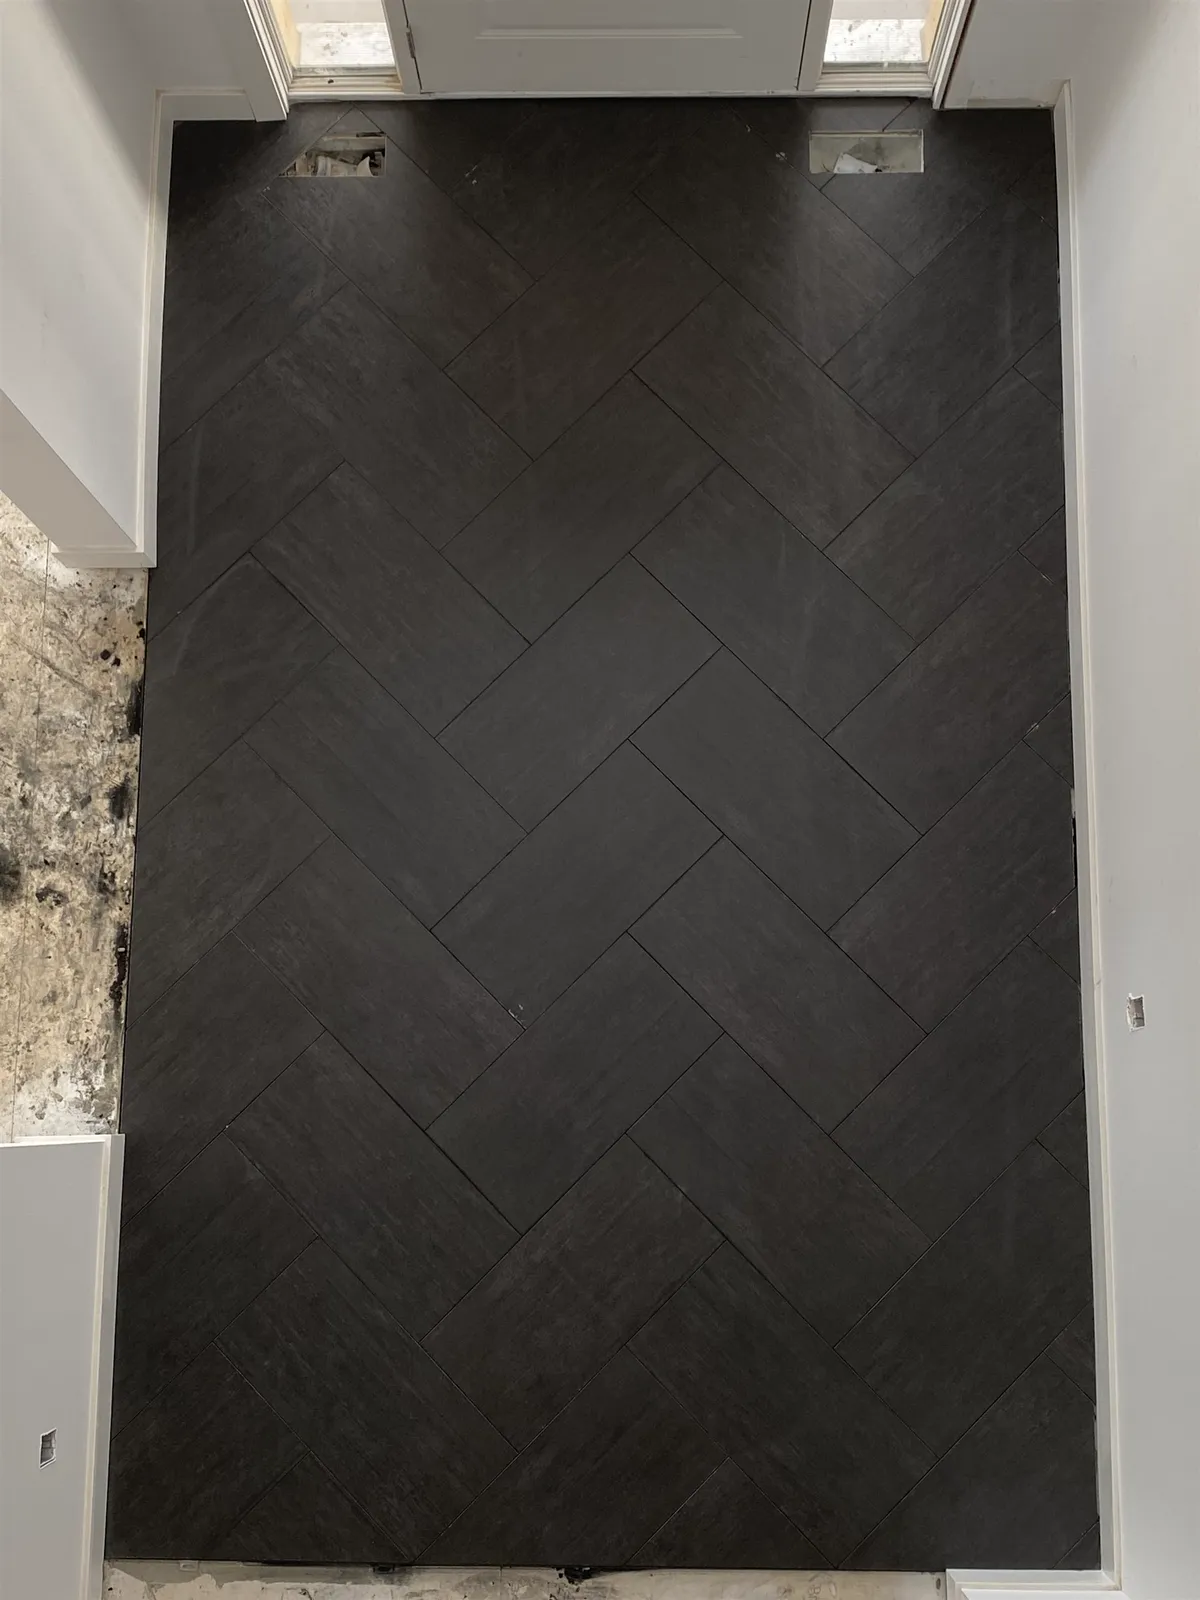
A herringbone hardwood floor is made of short rectangular boards laid in a zigzag, with the square end of each board against the side of the next. A chevron floor uses boards with angled ends, so they meet in a clean point down a straight line. Both are sold as matched A and B (left and right) boards, are laid out from a centreline, need a flatter subfloor than a straight floor, and take noticeably more labour and extra material.
A herringbone hardwood floor is one of the oldest patterns in wood flooring and one of the most requested again. It suits formal dining rooms, long hallways and open main floors, and it now comes in solid wood, engineered wood, vinyl plank and laminate. The chevron floor, its close relative, gives a cleaner, more graphic zigzag.
A herringbone wood floor looks simple once finished, and so does a chevron. Getting there takes more planning than any straight-lay floor. This guide covers the difference between herringbone and chevron, how the boards are made, how a layout is set, how the floor is fastened, and what to expect for labour and waste. If you are planning a tile pattern instead, see our herringbone floor tile guide, which covers tile layouts, sizes and grout.
Herringbone vs chevron floor: the difference
The difference is in the ends of the boards. Herringbone boards are ordinary rectangles with square ends. In the pattern, the end of one board butts against the long side of the next. The zigzag is stepped, and the line where the two sides meet has a slight sawtooth.
Chevron boards have their ends cut at an angle. The angle varies by product, and 45 degrees is common. The angled ends of the left and right boards meet in a single straight line, so each row forms a clean point, like a row of arrows. The result is crisper and more modern looking, with a strong sense of direction.
Herringbone tends to look a little busier and more traditional, and it has more visual texture. Chevron reads as bold stripes running the length of the room. Neither is better. Look at large photos or a dry-laid sample of each in your own room before choosing. Chevron boards are made as chevron in the factory, with the ends cut at the angle and the tongue and groove milled to match. You can't make a chevron floor by cutting ordinary boards on site without a lot of extra cutting and waste.
A and B boards: how herringbone hardwood is made
Most herringbone and chevron boards come as two mirror-image types, usually labelled A and B or left and right. The tongue and groove are milled on opposite sides of each type, so an A board only locks to a B board in one direction. In the floor, the A boards form one side of each zigzag and the B boards the other.
The two types are often packed in separate boxes. Order equal numbers of each, and keep the boxes labelled until the installer opens them. Mixing them up isn't a disaster, but a box opened on the wrong side of the room wastes time. When reordering for a repair, both types are needed.
Herringbone wood comes in two main forms. Solid herringbone is one piece of wood, often tongue and grooved, and some traditional solid blocks are glued down and sanded and finished on site. Herringbone engineered hardwood has a real wood top layer on a stable core and is usually prefinished. Engineered is the usual choice over concrete, in condos and over radiant heat where the maker allows it. The general trade-offs are in engineered vs solid hardwood.
Board sizes and how they change the look
Herringbone boards are short compared with straight-lay planks, and each board is several times longer than it is wide. That ratio shapes the zigzag. Longer, narrower boards give a long, sharp pattern. Shorter, wider boards give a chunkier, more traditional look.
Size should suit the room. Small boards repeat the pattern many times, which works in a small room but can look busy in a large open space. Larger boards suit big rooms and long sightlines, where small ones would make the floor look restless. A double herringbone, with two boards laid side by side in each step, is another option for a wider pattern.
Species and colour matter too. White oak is a popular choice for herringbone because its calm grain lets the pattern show; see our white oak flooring guide. Strong colour variation between boards emphasises the pattern. A dark stain gives a formal look but shows dust and scratches more than a mid-tone matte finish.
Laying out a herringbone hardwood floor from a centreline
The layout is where a herringbone floor is won or lost. In a straight floor, the first row is set off one wall. In herringbone and chevron, the pattern is usually set off a centreline, so the points run down the middle of the room and the cuts at both side walls match.
A typical sequence looks like this:
- Choose the main sightline. Usually the view from the front door, the main doorway or down a hallway. The points of the pattern run along it.
- Find and snap the centreline of the room along that sightline. In some rooms, the centre of a fireplace, a window or a kitchen island matters more than the walls.
- Snap control lines. Lines along the inside and outside points of the zigzag help keep every row straight.
- Dry-lay a section to check the edge cuts at the walls and doorways, and shift the centreline slightly if a thin sliver would land at the main doorway.
- Set a square, straight starting section. Many installers fasten a straight guide board or build a small starter section on the bench. Any error in the first boards grows across the room.
- Work outward along the line and toward both walls, checking the control lines every few rows.
- Cut the edges last. Almost every board at the perimeter gets an angled cut.
When the pattern continues through several rooms or down a hallway, the centreline is extended through the doorways first. A pattern that drifts off centre is obvious where a hallway meets a room. The general hardwood steps, such as moisture checks and racking boards from several boxes, are in our hardwood installation guide.
Borders, frames and feature strips
Many herringbone floors are framed by a border: one or more rows of straight boards running around the edge of the room. The herringbone field is cut along a straight line at the border, which gives a cleaner finish than angled cuts against the baseboard. Border corners are usually mitred. The border can match the field or use a contrasting species or stain.
A border makes the room's shape more visible. Walls that are out of square or out of parallel show as a border that narrows from one end to the other. The installer measures the room first and decides how to split any difference, often keeping the border even along the most visible walls.
A feature strip at a doorway is a smaller version of the same idea. It gives the herringbone a clean stop and a straight edge to meet the next room's floor. Borders and feature strips add their own cutting and fitting time, so include them in the plan from the start.
Glue-down, nail-down or floating
The maker's instructions set which methods each herringbone product allows. Short boards in two directions change how fastening works compared with a straight floor.
Glue-down is the most common method for herringbone wood. Each board is bonded with the adhesive the flooring maker approves, spread with the notch the adhesive maker lists. On concrete, it is often the only option, after the slab passes the moisture test; see engineered hardwood on concrete. On wood subfloors, many installers glue and pin, using small pins to hold each board while the adhesive cures.
Nail-down is possible with some solid and engineered herringbone products on a plywood or OSB subfloor, using the fastener the maker lists. Short boards leave little room for fasteners, so makers often call for adhesive as well. Nail-down herringbone needs a solid, squeak-free subfloor even more than a straight floor.
Floating herringbone uses click joints and rests on an underlay. It is available in some engineered products and in most herringbone vinyl and laminate. It is quicker to install but needs a very flat subfloor and the full expansion space at every wall.
Subfloor flatness for herringbone
Flatness matters more for herringbone than for a straight floor. In a straight floor, long boards run in one direction and follow gentle changes in the subfloor along their length. In herringbone, short boards meet their neighbours at the ends and sides in two directions. A dip or hump makes one board sit higher than the next at the joint, and that edge catches the light and wears faster.
Makers set a flatness tolerance for each product, and herringbone usually leaves the least room for error. On wood subfloors, loose panels are screwed down, high seams sanded or planed and low spots filled. On concrete, high spots are ground and low areas filled with a patch or self-levelling compound. In older homes with bouncy or uneven floors, this preparation can take as long as the floor itself.
Waste, labour and what drives the cost
Herringbone and chevron floors cost more than straight floors of the same wood. The material often costs more per square foot, because the boards are made specially for the pattern. More of it is wasted, because nearly every board at the perimeter is cut at an angle. Many makers and installers plan for something like 10 to 15 percent extra or more, compared with less for a straight floor. Small rooms, many doorways and borders push the figure up.
Labour is the bigger difference. Setting the centreline, building a square start, checking control lines, angled cuts at every edge and fitting borders all take much longer than laying straight rows. Glue-down work adds time for clean adhesive handling. Subfloor flattening is often more extensive too.
Our guide to hardwood floor installation cost in Ottawa explains the typical ranges and what moves them, and pattern work sits at the higher end. A written quote should say whether borders, feature strips and subfloor levelling are included.
Transitions, doorways and expansion space
A straight-lay wood floor moves mainly across the width of its boards, so most of its movement runs in one direction. A herringbone floor has boards in two directions, so it moves both ways. It needs expansion space at every wall and fixed object, as the maker sets. The gap is hidden under baseboard or quarter round, which is nailed to the wall rather than the floor. See quarter round vs baseboard.
Where herringbone meets another floor, plan the stop line before the layout is final. A border or feature strip at the doorway, a threshold or a T-moulding gives a clean edge. Check the heights of both floors before ordering, especially with glue-down herringbone next to a floating floor on an underlay. Our guide to floor transition strips explains each type.
Doorways also show the pattern most. The installer aims to have the pattern centred on the main doorway, with no thin slivers at the threshold. Door casings are undercut so the boards slide underneath.
Herringbone LVP and laminate
Herringbone luxury vinyl plank and laminate give the pattern at a lower material cost, with less concern about water or seasonal humidity. Most are click products sold as A and B boards, floated over the underlay the maker specifies. Some glue-down vinyl comes in herringbone shapes as well; our guide to click vs glue-down vinyl plank compares the two methods.
The layout rules are the same as for wood: a centreline on the main sightline, a square start, planned edges and extra material. Click herringbone has many more joints per square foot than straight planks, so a flat subfloor matters even more. A board flexing over a dip stresses its locking joints and can open them. The full process for vinyl is in how to install vinyl plank flooring, and our vinyl flooring page shows the options we install. Agora installs hardwood, vinyl plank and laminate, and gives free estimates with a written quote.
Frequently asked questions
What is the difference between herringbone and chevron floors?
Herringbone uses rectangular boards with square ends, so the zigzag is stepped. Chevron uses boards with angled ends that meet in a straight line, so each row forms a clean point.
Is herringbone flooring more expensive?
Yes. The boards often cost more, more material is wasted at the edges, and the layout and cutting take much more labour than a straight floor. See hardwood installation cost for what drives the price.
Can herringbone hardwood be installed on concrete?
Engineered herringbone can, usually glued down after the slab passes the maker's moisture test. Solid hardwood is not recommended directly on concrete.
Can you install a herringbone floor yourself?
Click herringbone vinyl or laminate in a simple room is possible for a patient DIYer. Glue-down or nail-down herringbone wood, with a centred layout and borders, is skilled work where small errors grow across the room.
Which way should a herringbone floor run?
Usually with the points running along the main sightline, such as the view from the front door or down a hallway, centred in the room.
Do you need A and B boards for herringbone?
For most tongue and groove and click products, yes. The two types are mirror images and lock together only one way, so order equal numbers of each.