
Short answer
Tile and grout let water through, so a shower needs a waterproofing layer behind the tile and a floor sloped to the drain. Today that is usually a bonded membrane such as Schluter-KERDI or a liquid-applied membrane, installed over the walls and a sloped shower floor, with every seam, corner, drain and valve sealed.
Most people assume tile is what keeps a shower dry. It is not. Cement grout is porous, and even porcelain tile has joints that water gets through. A shower lasts or fails based on what is behind the tile, which is exactly the part you never see once the job is done.
What a waterproof shower needs
- A continuous waterproof layer across the walls and floor, with no gaps at seams, inside corners or where the wall meets the floor.
- A floor sloped to the drain (typically about ¼ inch per foot) so water never sits.
- A drain that connects to the waterproofing, not just to the tile.
- Sealed penetrations: the valve, shower head arm and any niches or benches.
The traditional method
For decades, showers were built with a plastic sheet behind cement board on the walls, and a floor made in layers: a sloped mortar base, a waterproof liner, then a second mortar bed on top. The top mortar bed stays wet after every shower, because the liner is underneath it. It works when done perfectly, but it relies on the liner and weep holes in the drain, and a mistake is buried under the tile.
Bonded membranes: how KERDI works
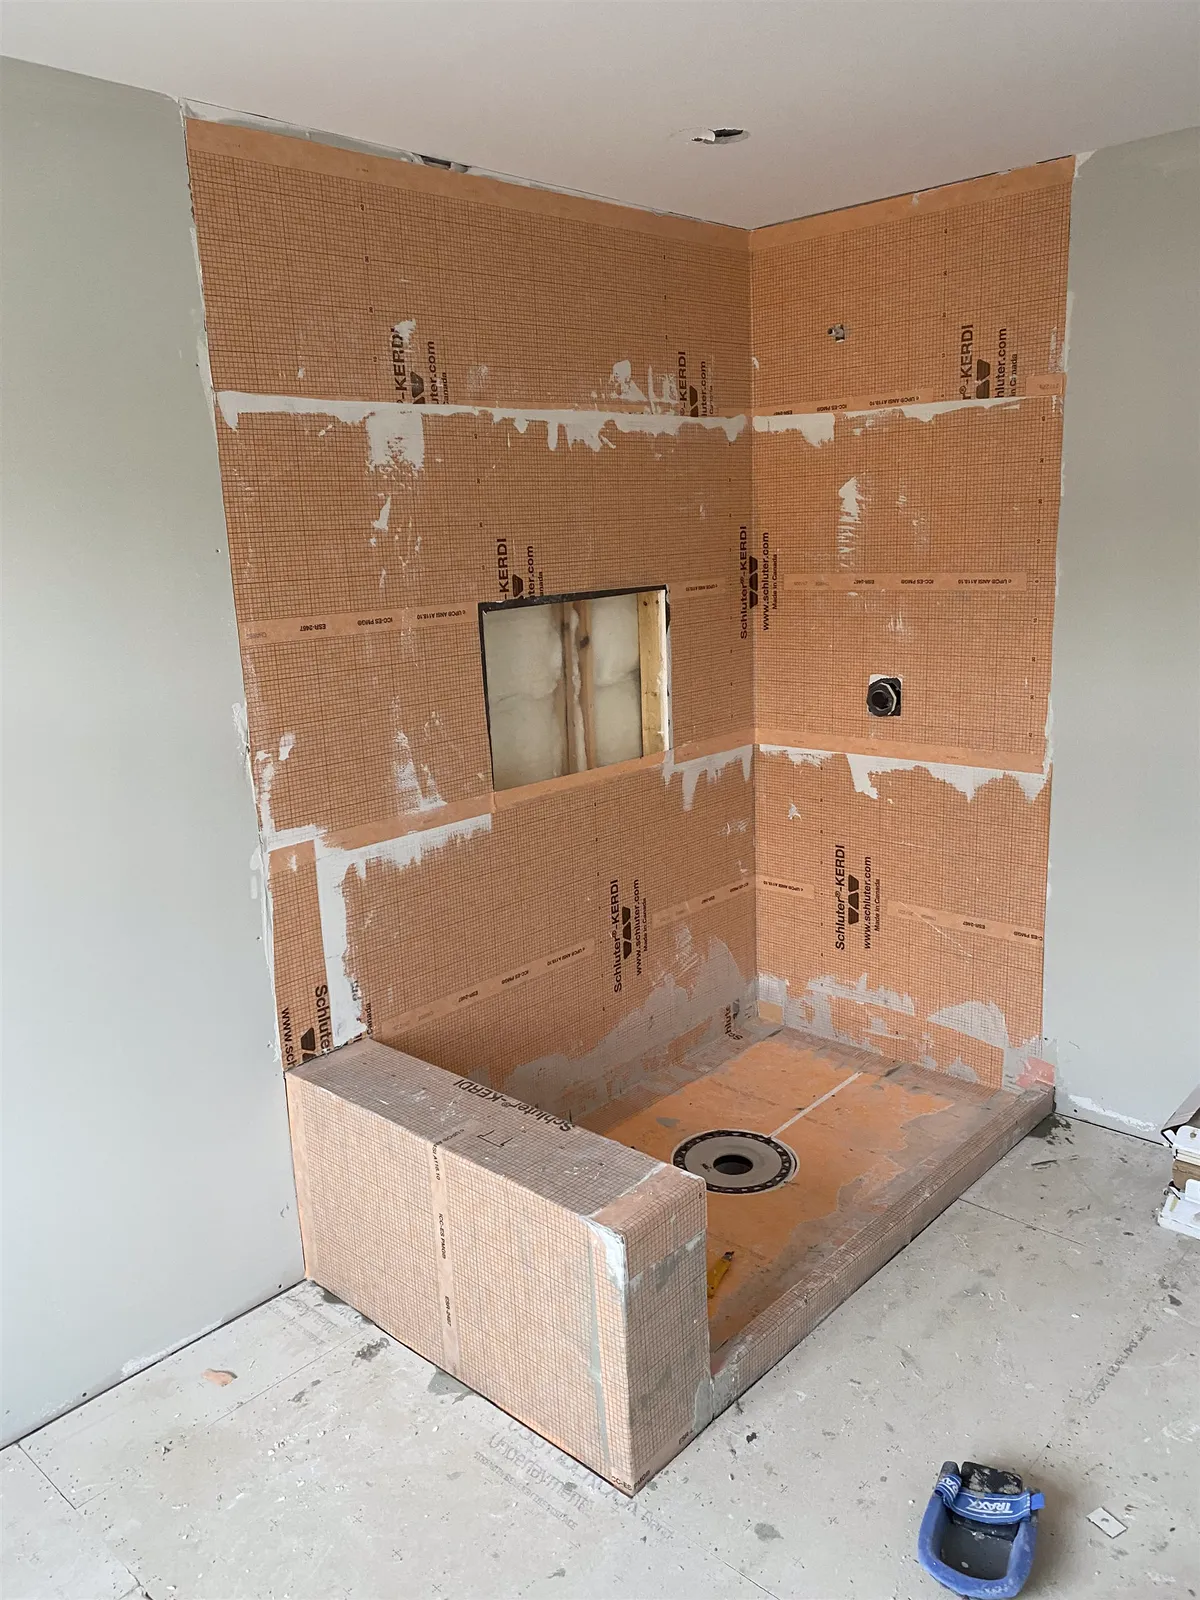
Schluter-KERDI is a thin, orange polyethylene sheet with a fleece on both sides. It is bonded to the walls and floor with thin-set mortar, and the tile is set directly on top of it. Because the waterproofing sits right under the tile instead of behind it, water cannot soak into the layers below.
- Walls: KERDI goes over the wall board, with seams overlapped or covered with KERDI-BAND and inside and outside corners sealed with pre-formed pieces.
- Floor: either a sloped mortar bed built by hand and covered with KERDI, or a pre-sloped foam tray from a KERDI shower kit. Both are covered in the membrane and connect to a KERDI-DRAIN or a linear drain.
- Penetrations: collars seal around the valve and the shower arm.
Liquid-applied membranes, painted on in coats to a specified thickness, follow the same principle. Whatever the system, the rule is the same: use one manufacturer's components together and follow its instructions.
Mortar bed or shower kit?
A hand-built mortar bed can be shaped to any size or layout, which suits custom showers, curbless entries and unusual drain locations. A pre-formed tray is fast and consistent for standard sizes. Many custom showers combine both. At 404 Ashbee Court, for example, showers were built with a custom KERDI kit and mortar beds.
Signs a shower was not waterproofed properly
- Grout that stays dark long after showering, or keeps cracking.
- Loose or hollow-sounding tiles.
- Mould or a musty smell at the base of the walls.
- Stains or soft drywall on the ceiling below, or on the other side of the shower wall.
If you see these, the fix is usually to take the shower back to the studs and rebuild it properly. Resealing the grout will not solve a missing or failed membrane.
Questions to ask your installer
- Which waterproofing system will you use, and does it cover the walls and the floor?
- How will the floor be sloped, and which drain connects to the membrane?
- How are the corners, seams, valve and niches sealed?
- Will you flood test the shower before tiling? (Plugging the drain and filling the pan to check for leaks is good practice.)
Once the waterproofing is right, you can choose tile for looks and grip. See how to choose shower tile.